
Sync Rules
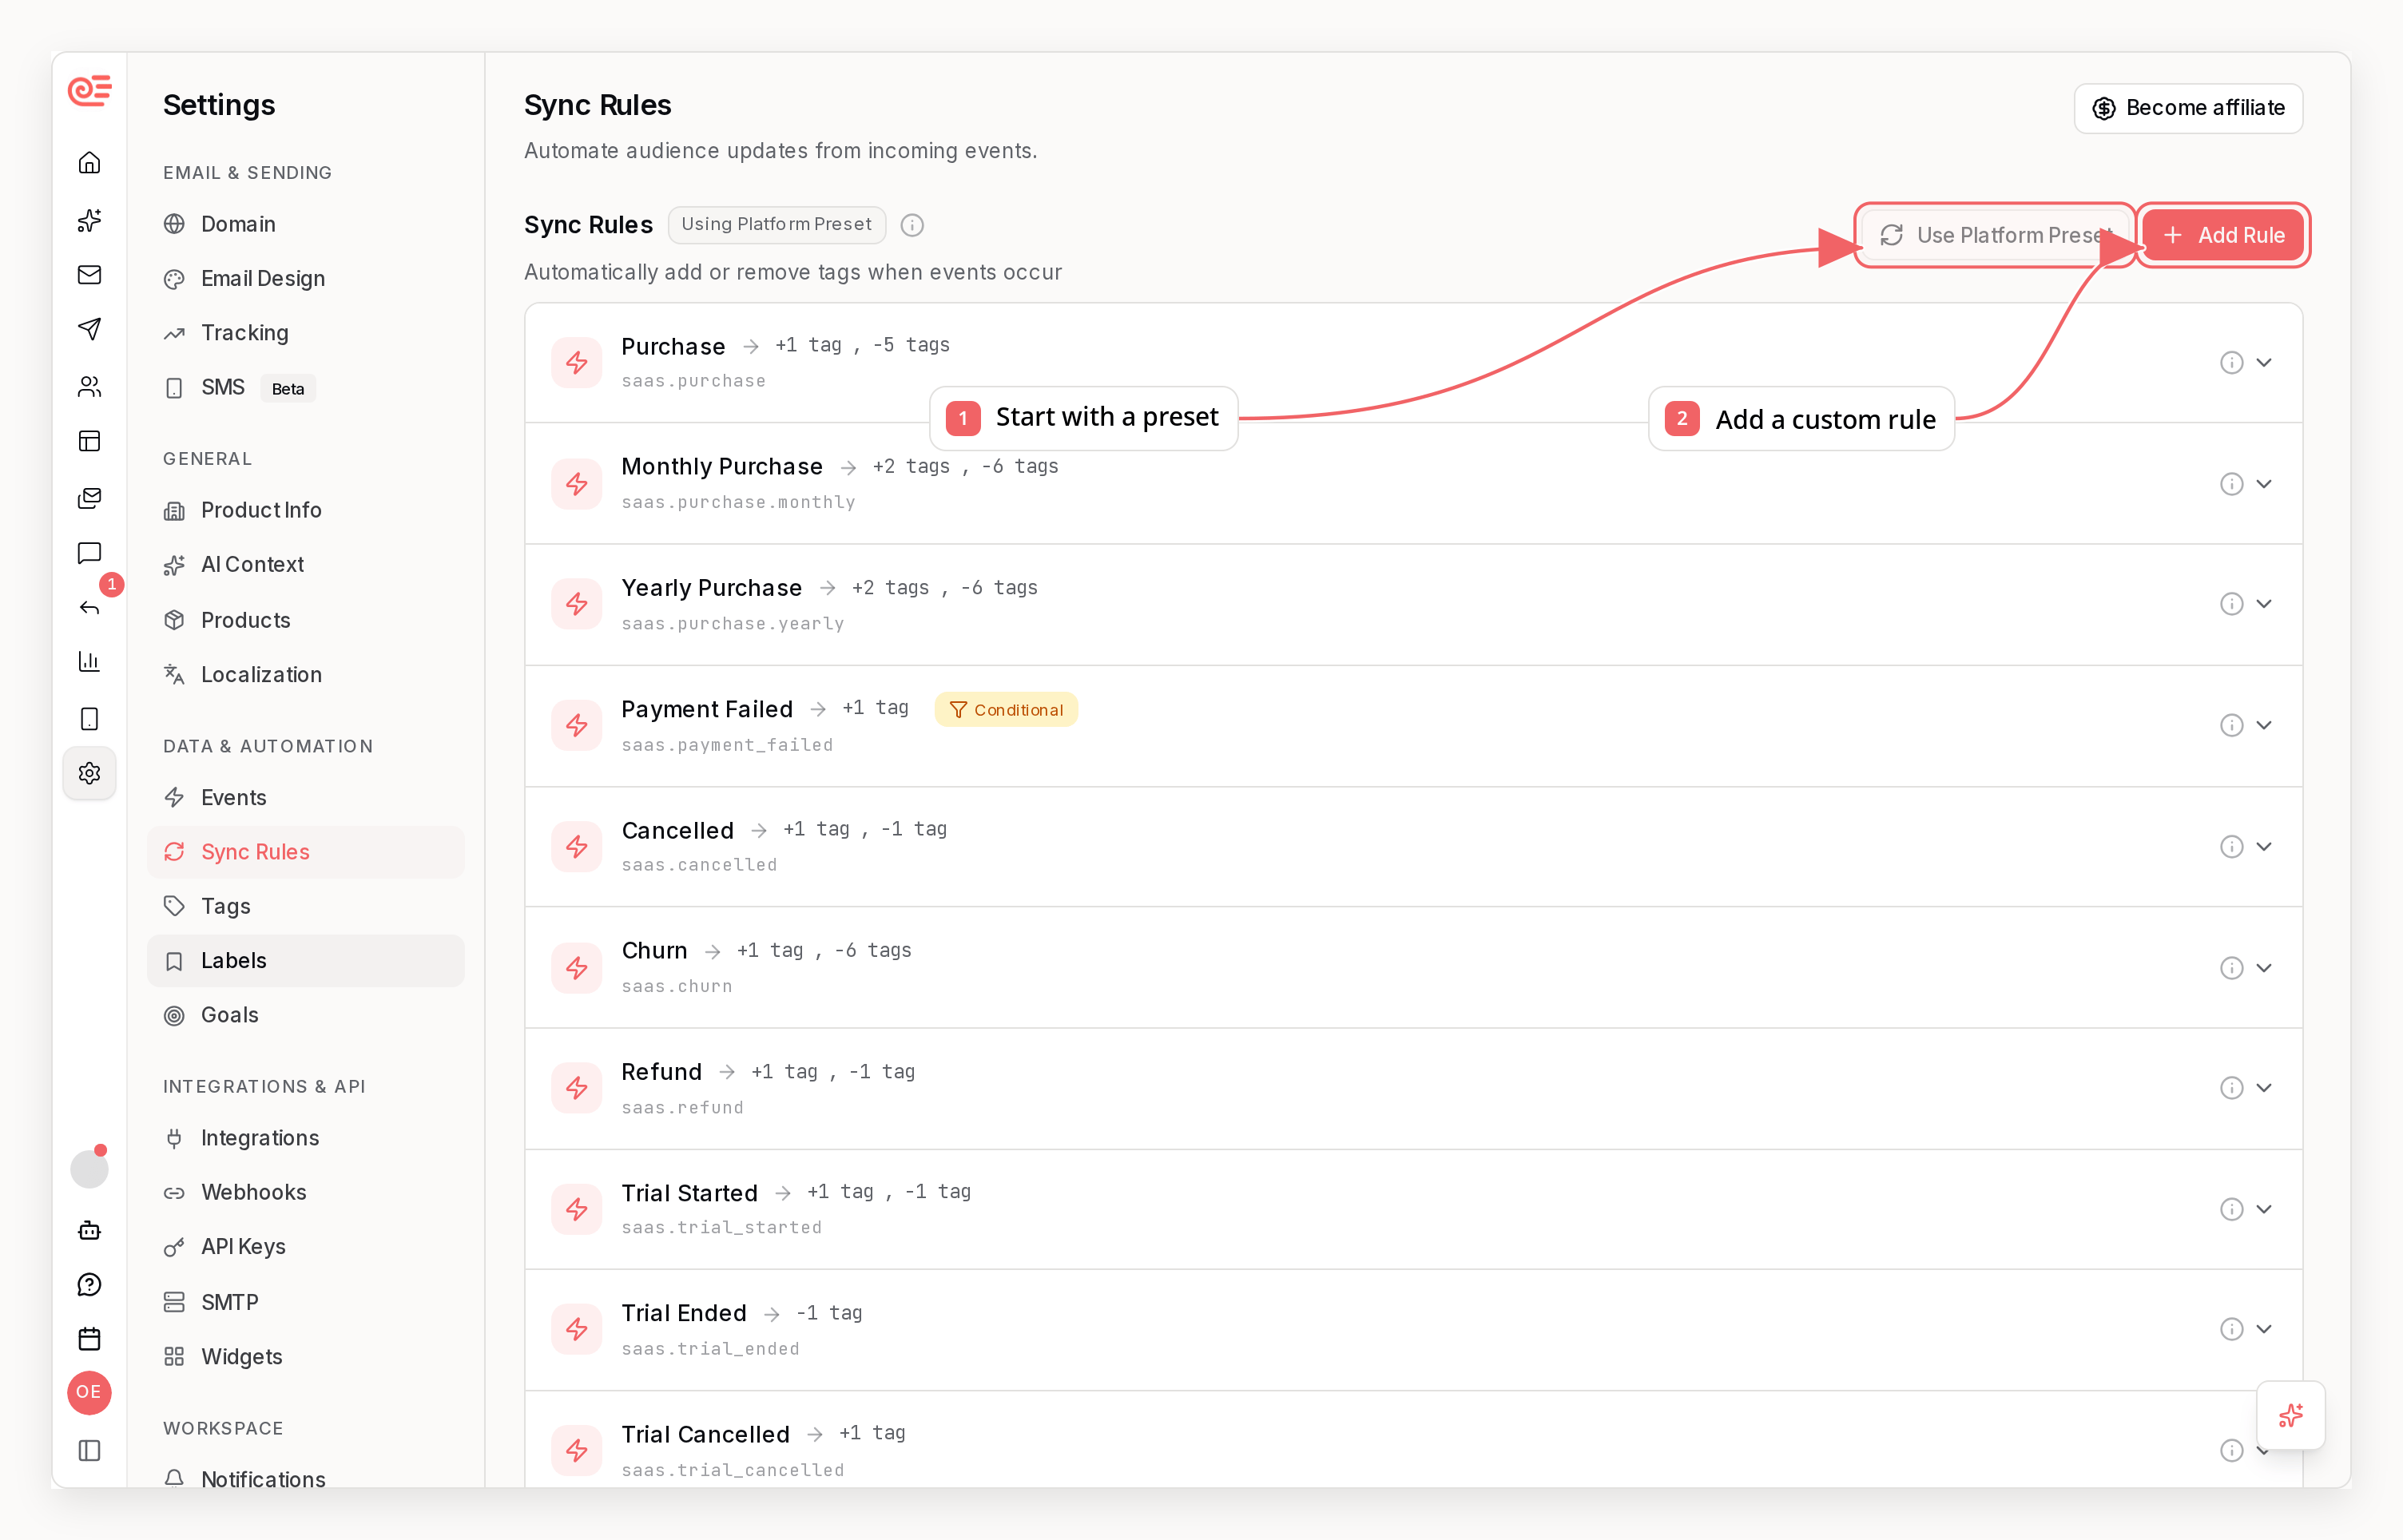
How Sync Rules Work
When an event is triggered for a subscriber:GET/PUT /api/v1/sync-rules,
the CLI has sequenzy sync-rules get and sequenzy sync-rules update, and
the MCP server provides get_sync_rules / update_sync_rules tools.
Optional Platform Preset
New workspaces start with no sync rules, so importing or subscribing a contact does not silently assign a business-stage tag. You can add rules in Settings or opt into Sequenzy’s legacy platform preset for common SaaS and ecommerce events. The preset includes rules such as:The platform preset is not enabled automatically for new workspaces. Review
its SaaS/ecommerce semantics before enabling it for a services, consulting, or
other relationship-led business.
email.opened, email.clicked, email.replied), delivery events (email.bounced, email.unsubscribed, contact.unsubscribed), and integration events like ecommerce.back_in_stock_requested. Rules on bounce and unsubscribe events only change tags; they never start a sequence for a suppressed contact.
Sync Rule Anatomy
Each sync rule defines:
Rules can also carry optional conditions: required subscriber tags, excluded
subscriber tags, and (for commerce events) a product match.
Product Match Conditions
Commerce events that carry products - order placed, product viewed, added to cart, and similar - can be filtered by the product itself. Add a Product match condition and the rule only runs when at least one product on the event matches your selected product tags, collections, or product types. This is how you build ownership audiences from purchases. For example, a record store tags every vinyl product withVinyl in Shopify, then adds a
rule:
vinyl-collector
automatically, ready to receive campaigns for that interest. Within a product
match, values in the same selector are OR’d (any of these tags) and different
selectors are AND’d (must match the tag AND the collection).
Rules with a product match never run for events without product context, so
they are safe to combine with tag conditions.
Execution Order
When an event triggers:- Event recorded - Stored in analytics
- Remove tags - Listed tags are removed first
- Add tags - Listed tags are added
- Automations checked - Sequences triggered by new tags
Use Cases
Customer Lifecycle
Track where subscribers are in their journey:Payment Status
Track payment health:Subscription Tiers
When integrated with payment providers:Custom Sync Rules
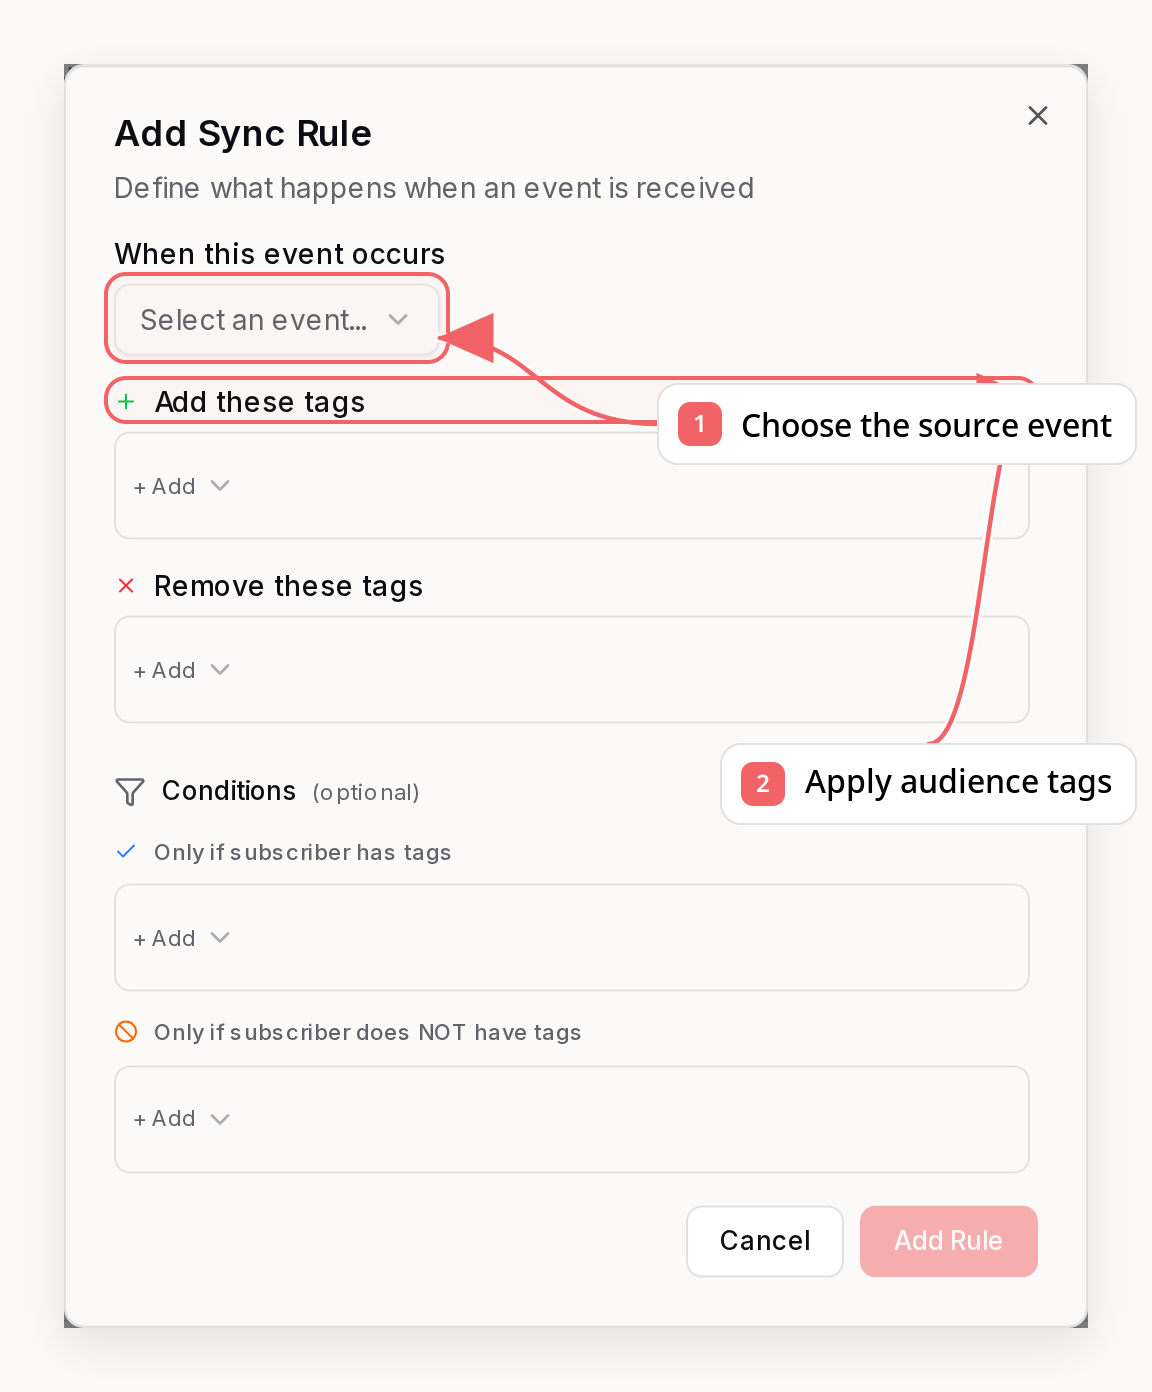
Example: Lead Scoring
Example: Engagement Tracking
Example: Onboarding Progress
Sync Rules + Sequences
Sync rules work seamlessly with sequences:- Keep event handling simple (just fire events)
- Centralize tag logic (sync rules)
- Build flexible sequences (tag-based triggers)
Payment Provider Integration
When you connect Stripe or other payment providers:Automatic Event Firing
The integration automatically fires events:Automatic Customer Sync
Stripe customers are synced as subscribers with:- Email from Stripe customer
- Name from Stripe customer
- Custom attributes for subscription data
Best Practices
1. Design Mutually Exclusive Tags
For lifecycle states, ensure only one tag at a time:2. Use System Tags Consistently
Stick to the built-in tag names:3. Test Your Rules
Before going live:- Create a test subscriber
- Trigger events via API
- Verify tags are added/removed correctly
- Check that sequences trigger
4. Document Custom Rules
Keep a reference of your custom sync rules:5. Don’t Overcomplicate
Start with default rules, add custom ones as needed:Debugging Sync Rules
Check Event Fired
View subscriber’s event history in dashboard.Check Tags Applied
View subscriber’s current tags after event.Common Issues
Related
Events
Events that trigger sync rules
Tags
Tags managed by sync rules
Sequences
Automations triggered by tags
Subscribers
Contacts that receive tags