
Campaigns
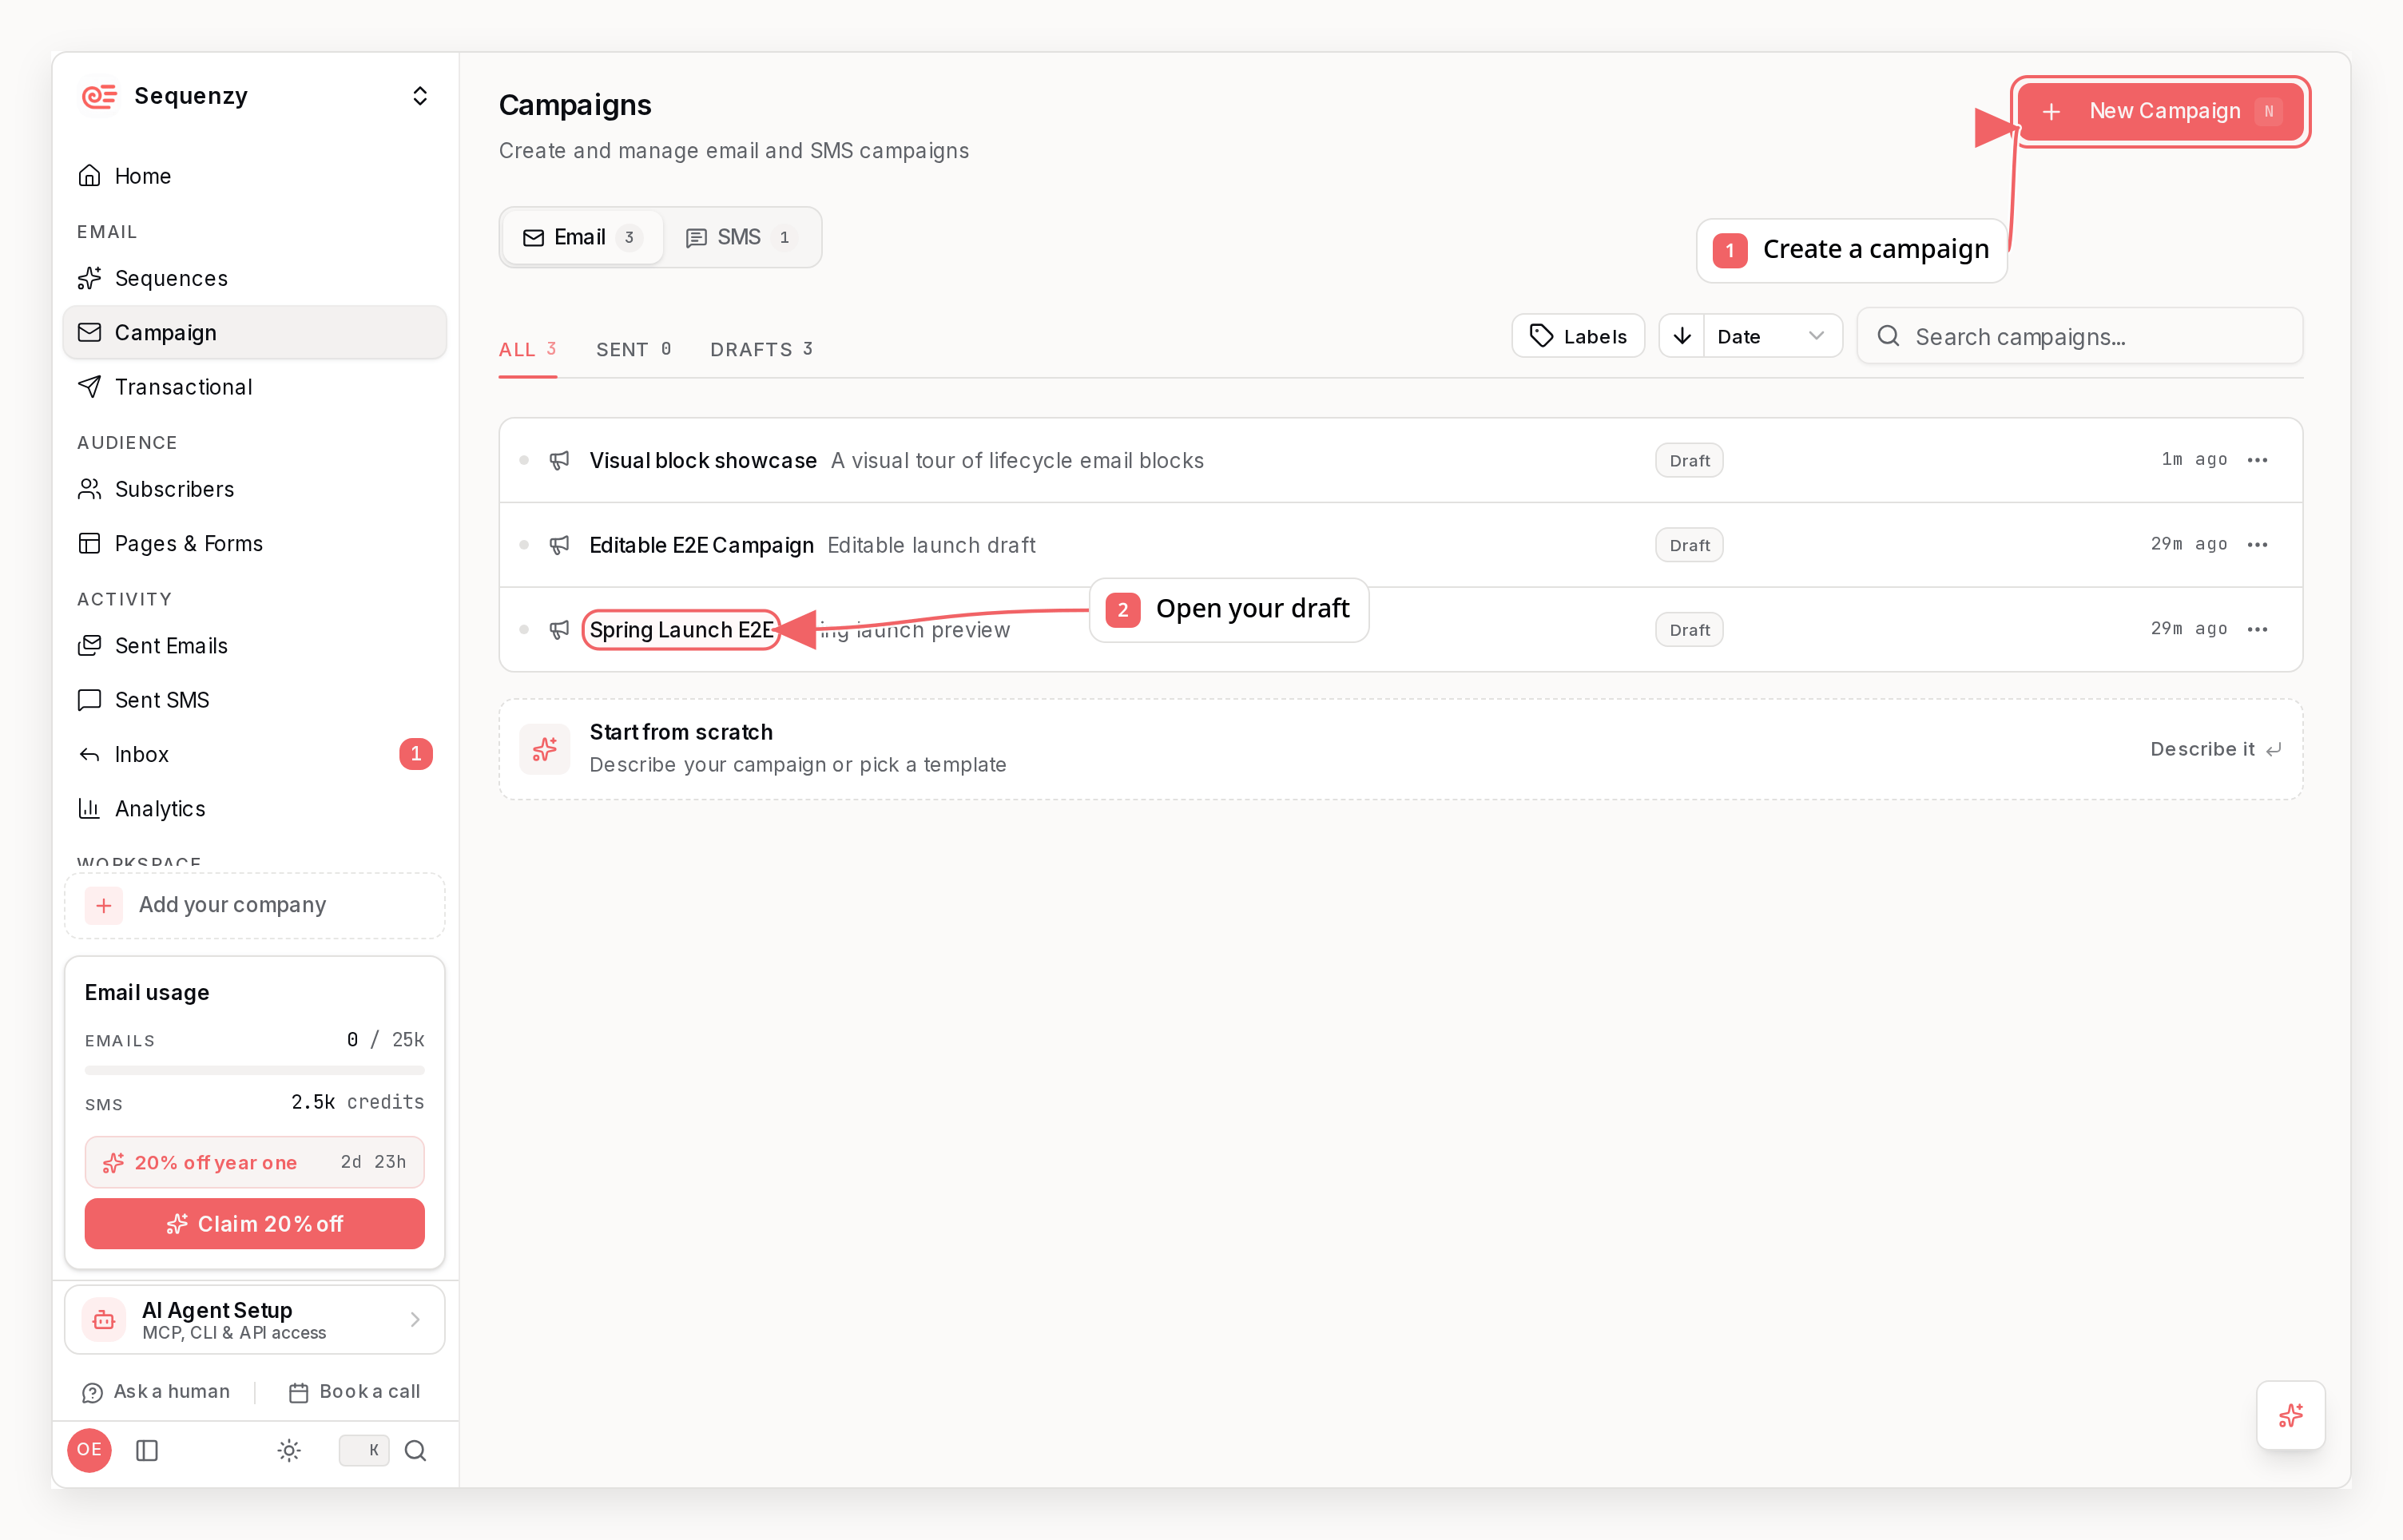
Campaigns vs Sequences
Campaign States
Safety Review
Scheduling a campaign can put it inwaiting_approval instead of scheduled.
This is an anti-abuse hold, not an error: nothing is sent while a campaign is in
this state, and the campaign is not lost.
This most often happens on new accounts. The checks run against your account
and your sending domain, so a brand-new workspace or a recently registered
domain is the usual reason a first send is held. Once your account and domain
have a track record, later sends normally go straight to scheduled.
A campaign is held when any of these apply:
- New or unverifiable domain. Your sending domain or your company website domain was registered in the last 7 days, has no public registration record, or the website did not respond when we checked it.
- Content that matches known abuse patterns. Business-opportunity, guaranteed income, or high-pressure “act now” language in the subject, preheader, or body.
- Automated content review. Campaigns to 10 or more recipients, or campaigns whose content hits our review watchlist, are checked automatically before the first send.
What happens next
Held campaigns are reviewed by the Sequenzy team. When a review finishes:- Approved - the campaign returns to
scheduledand sends at its original time. If that time has already passed while it waited, it moves straight tosending. - Rejected - the campaign moves to
rejectedand the reason is available inrejectionCommentonGET /api/v1/campaigns/{campaignId},sequenzy campaigns get <id>, and theget_campaignMCP tool.
If you are building an unattended integration, treat
waiting_approval as a
normal outcome of scheduling. Check status in the schedule response, and if
it is waiting_approval, log it and poll the campaign instead of retrying the
schedule call. Retrying will not clear the hold.Creating a Campaign
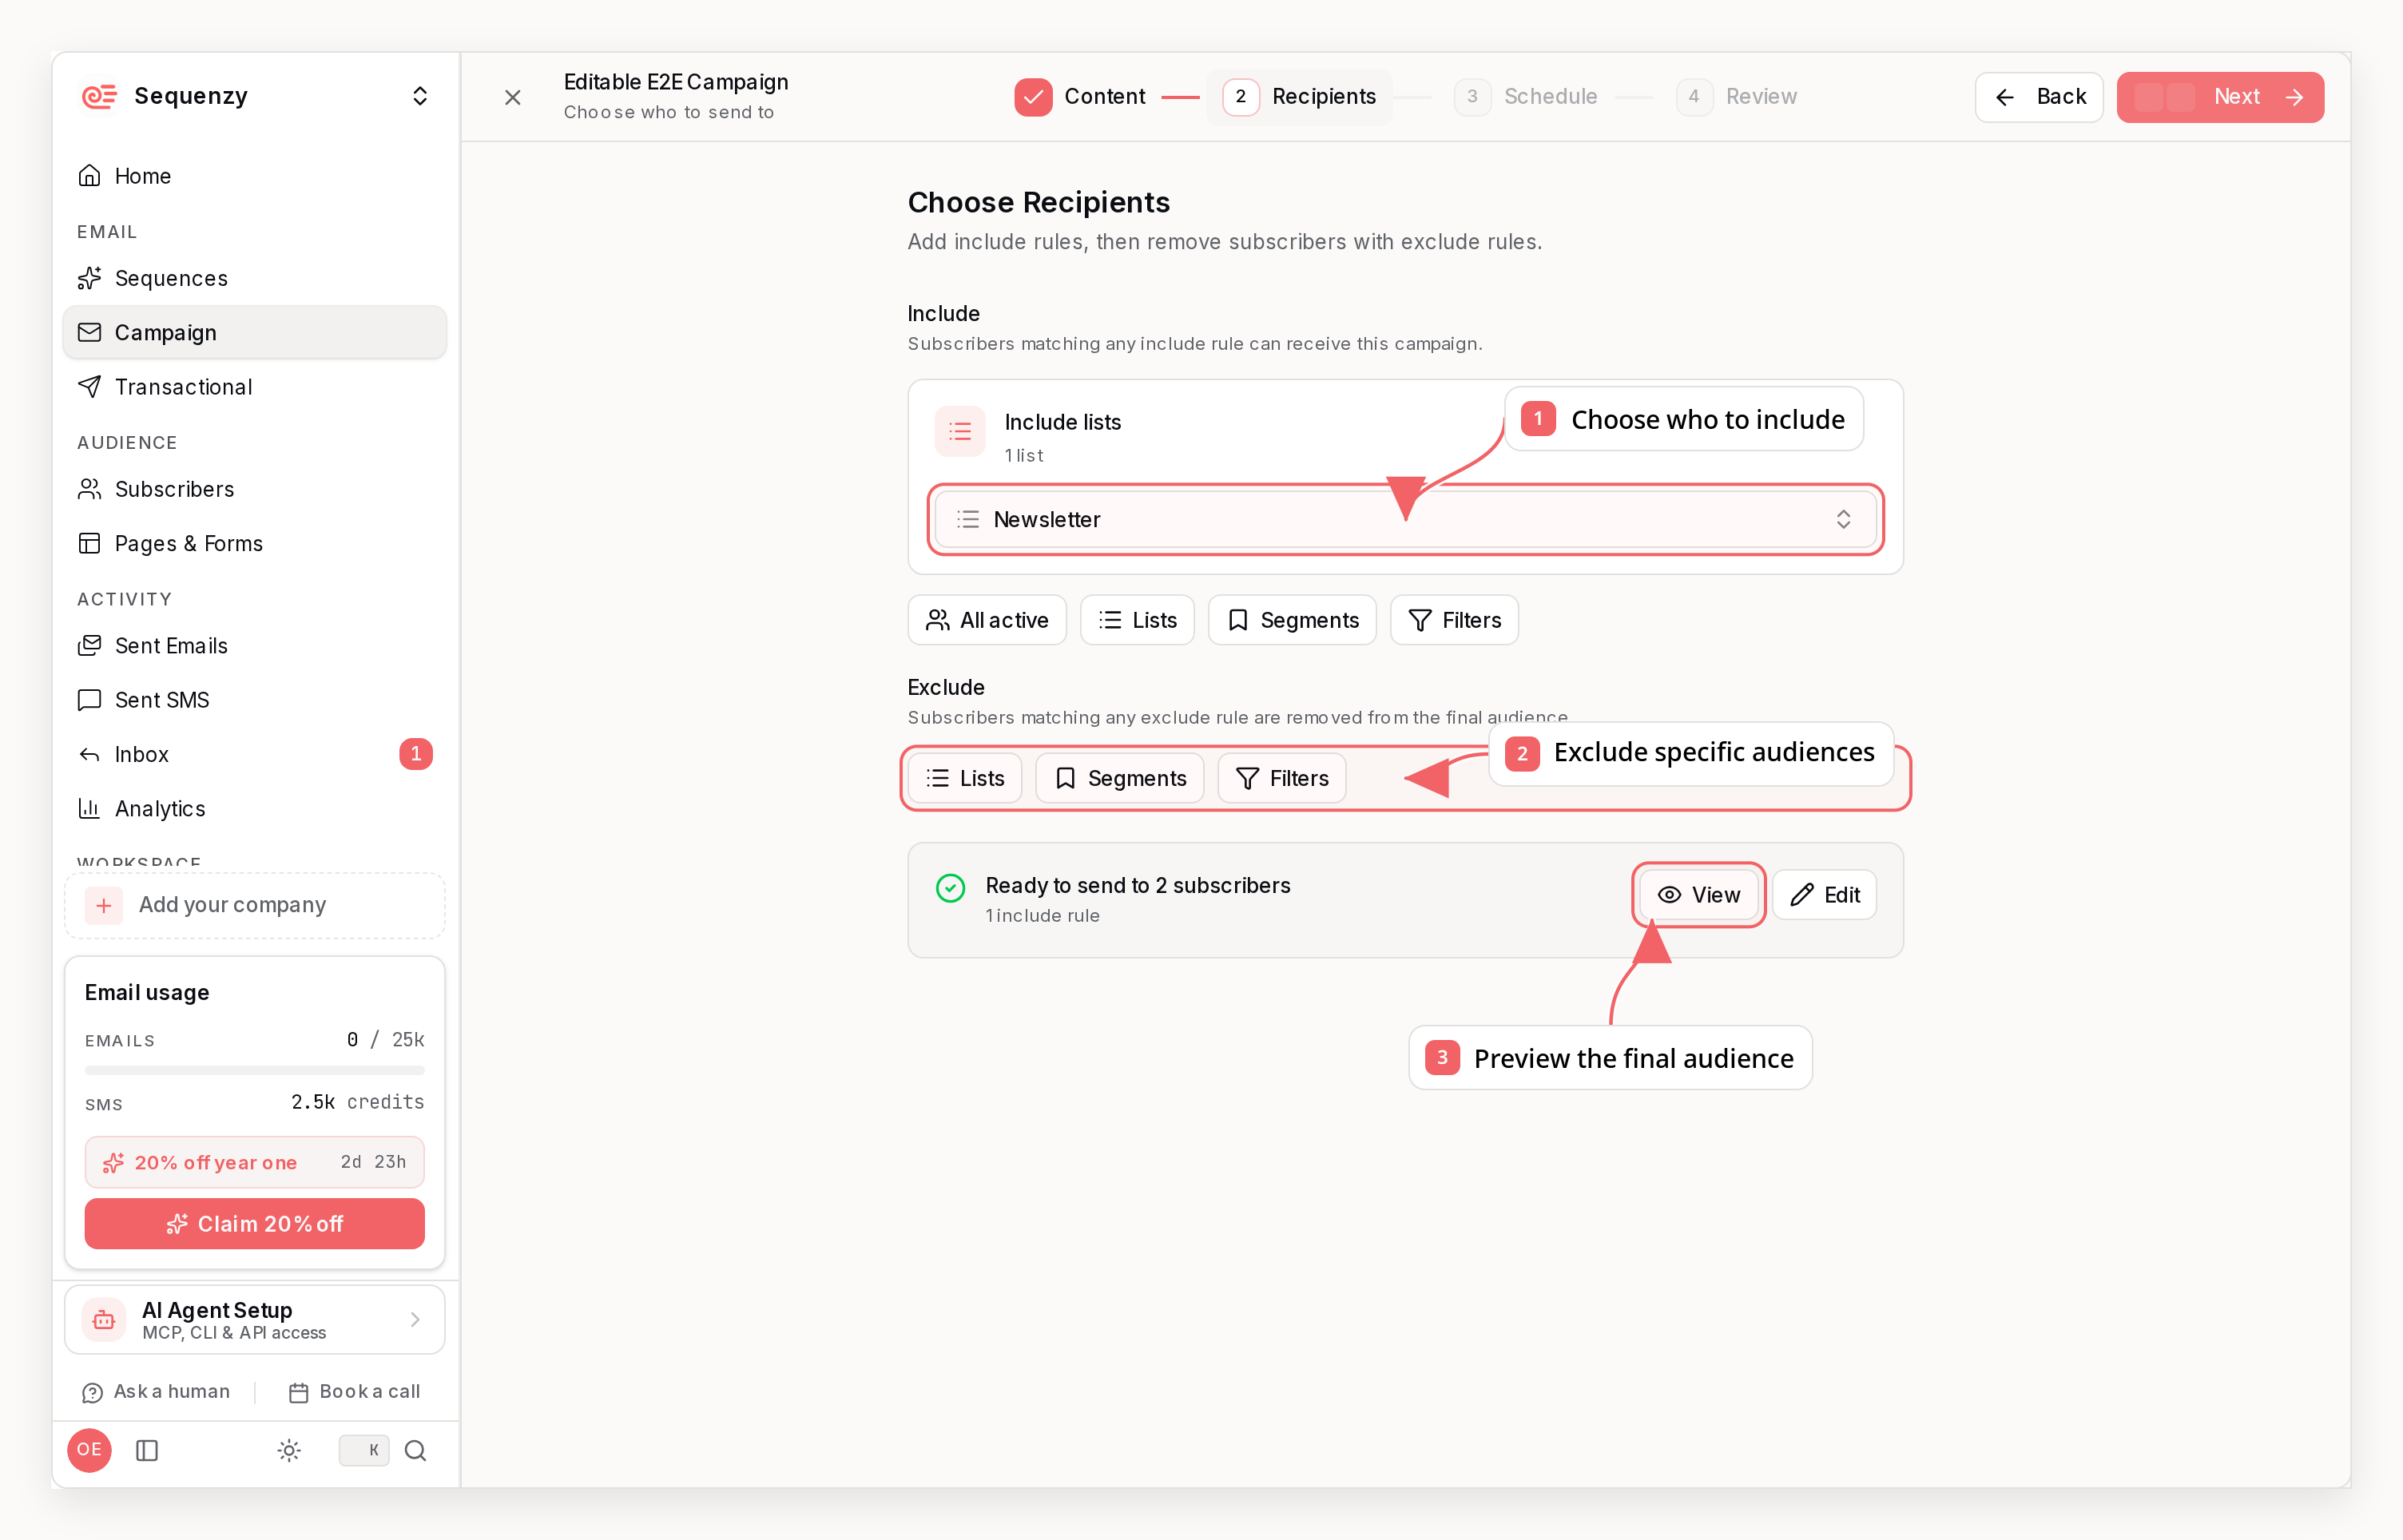
1. Choose Recipients
From Contacts, apply filters or select contacts, then choose Create campaign. Analytics activity groups offer the same action. Choose a template, use an existing email, start blank or write an AI prompt. The complete matching group across every page is saved directly in the campaign when you create the draft. This does not create a list, change list membership or enroll contacts in sequences. New matching contacts do not join the draft automatically; edit its selected contacts or use a saved segment if you want a changing audience. Email eligibility is checked before sending. Saved lists and segments keep their existing Create campaign and Create sequence actions. Unsaved filtered groups offer campaign creation only. Draft campaign rows show an Audience set chip when an audience has been configured. It is not a final recipient count; review the audience before sending. Use Create Campaign for a Group,sequenzy campaigns from-audience, or MCP create_campaign_for_audience to create a blank draft with the same frozen contact selection. Update its content using the existing campaign tools before reviewing and sending.
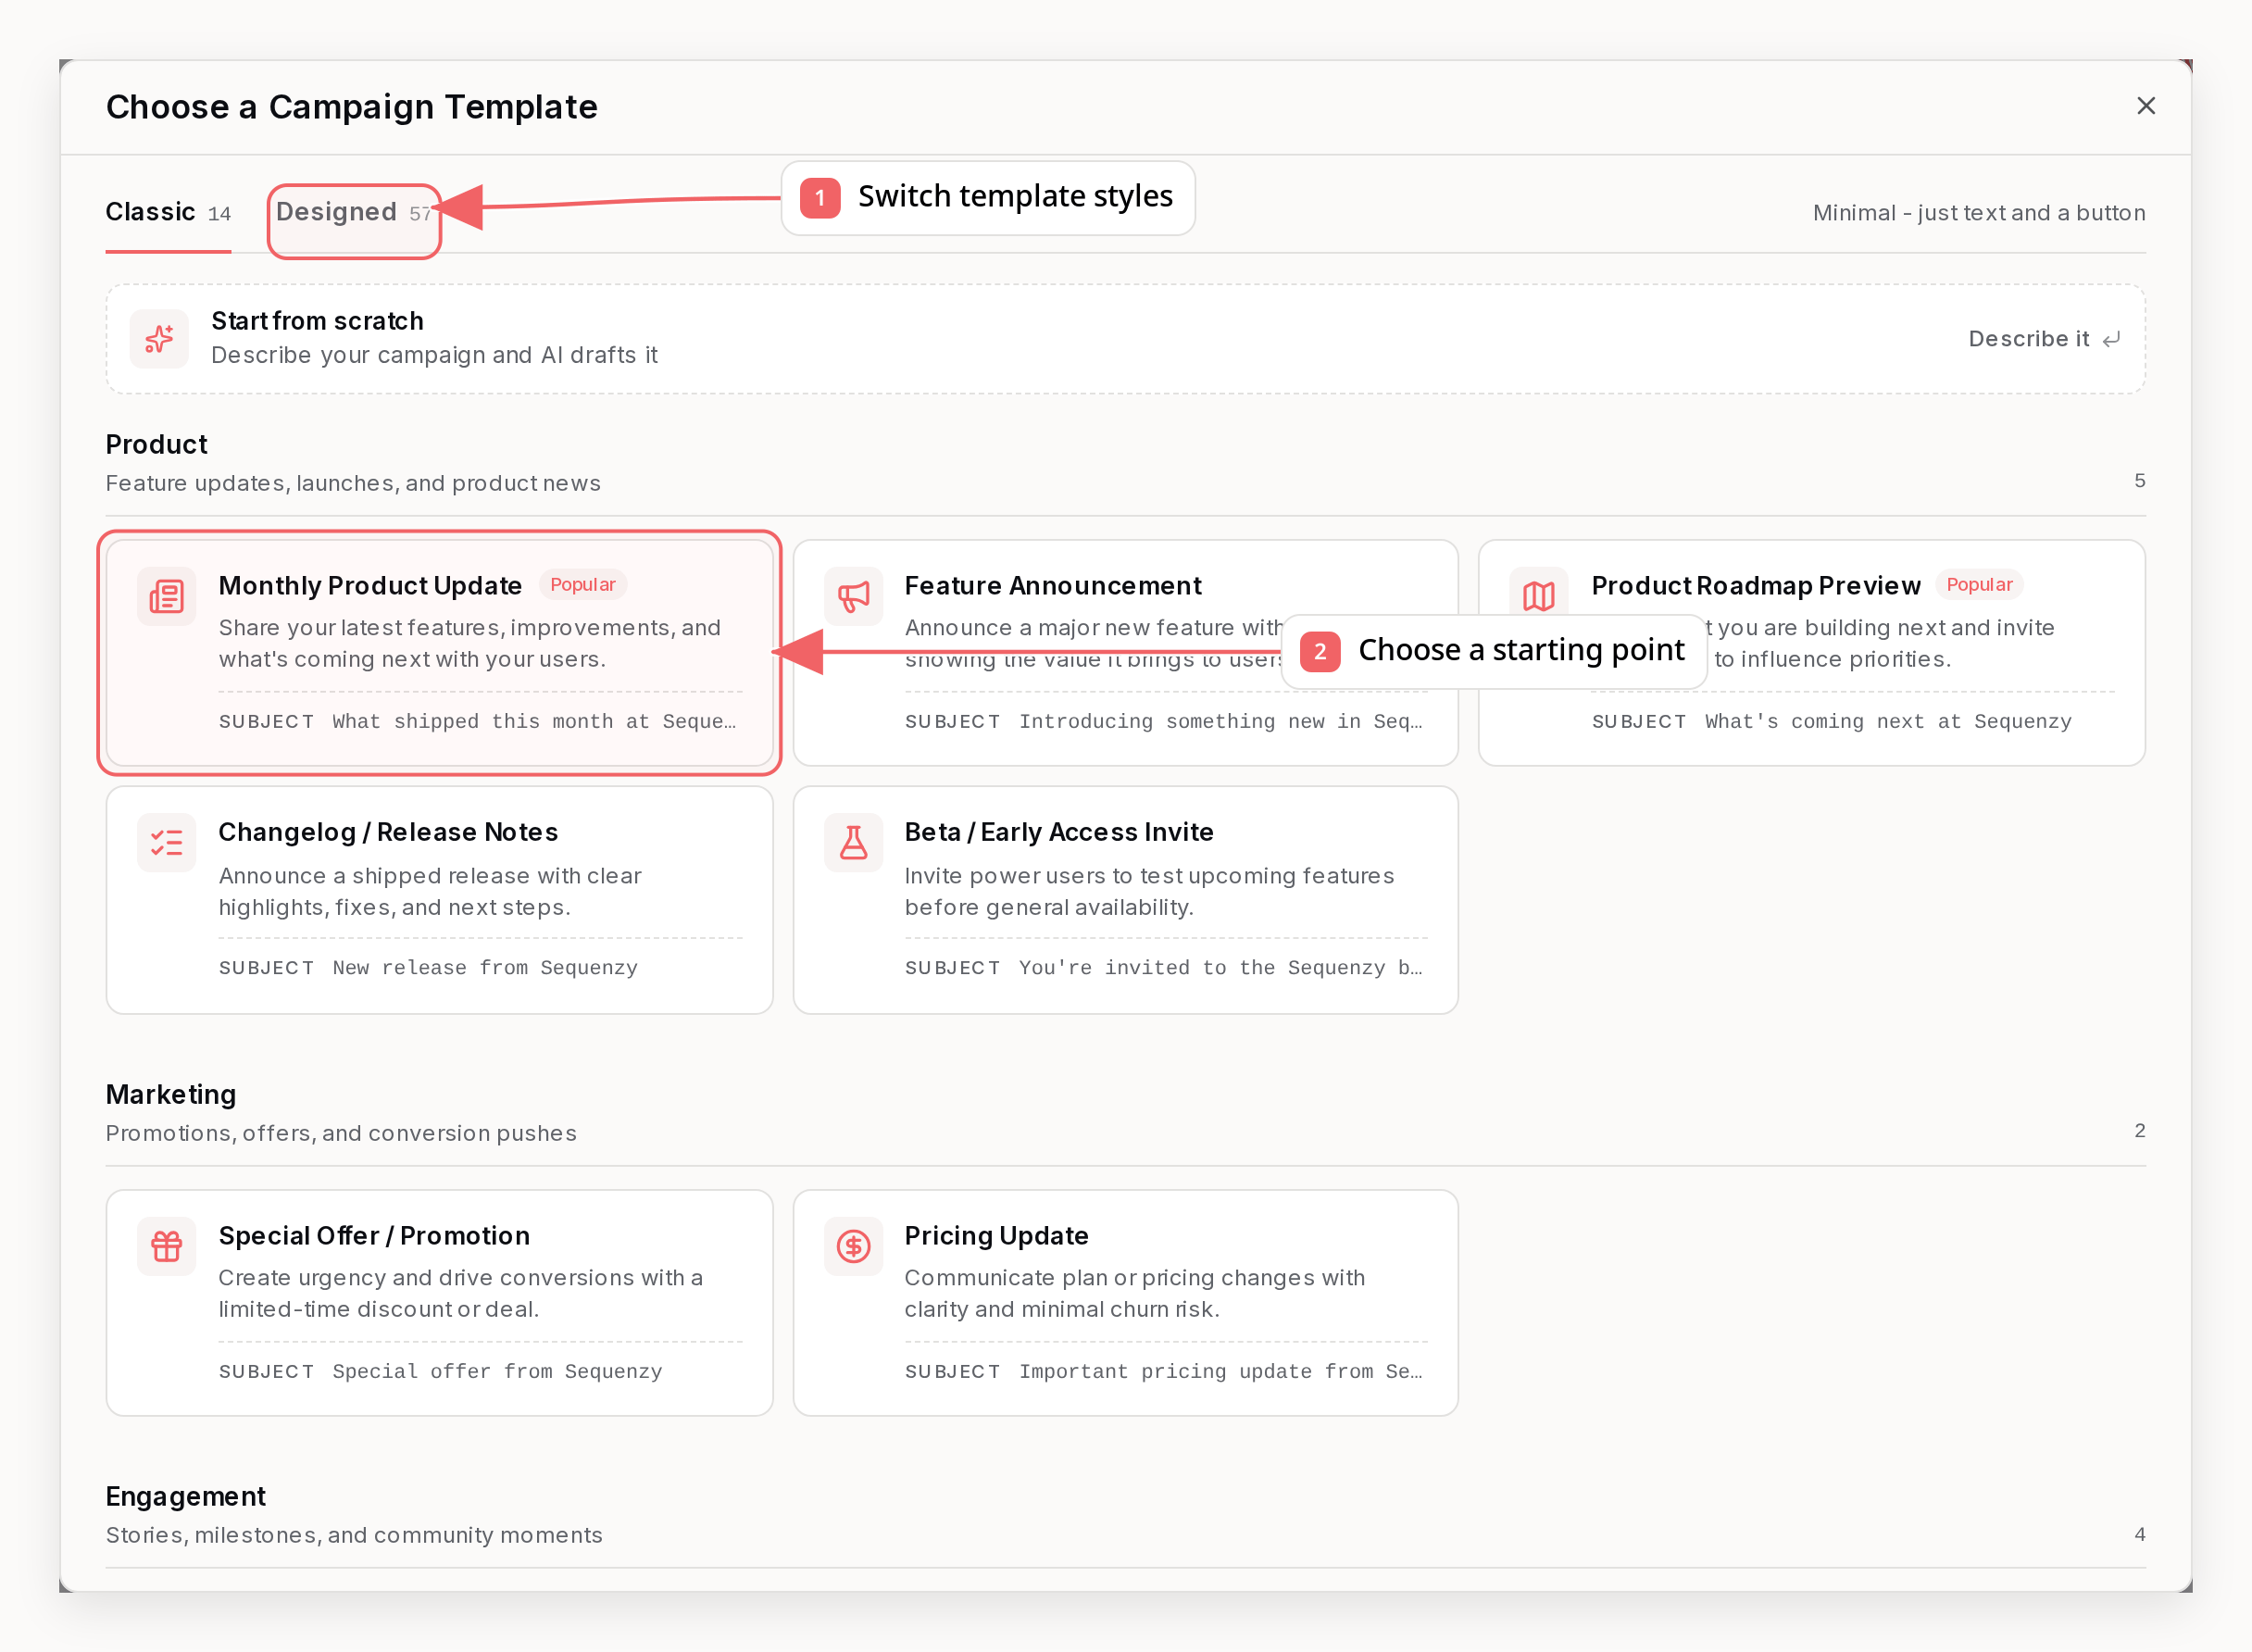
2. Select Email Template
Choose or create the email content:- Use an existing template from your library
- Create new content in the editor
- Duplicate and modify a previous campaign
equals, contains, exists, or numeric comparisons.
Conditions are not limited to profile values: you can also target segment membership, custom events (for example “performed purchase in the last 30 days”), tags, lists, subscription status, engagement (opened or clicked recently), Stripe and store purchases, signup date, email provider, and SMS status - the same filters you use to build segments. These rules are checked against live subscriber data when each email is sent.
For an else branch, use the Conditional (if/else) block, or duplicate the block and invert the rule on the copy. Attribute and variable conditions use the same merge-tag variable names you already use in emails, but without the {{ }} braces.
3. Choose Sender
Select who the email appears to come from:4. Schedule or Send
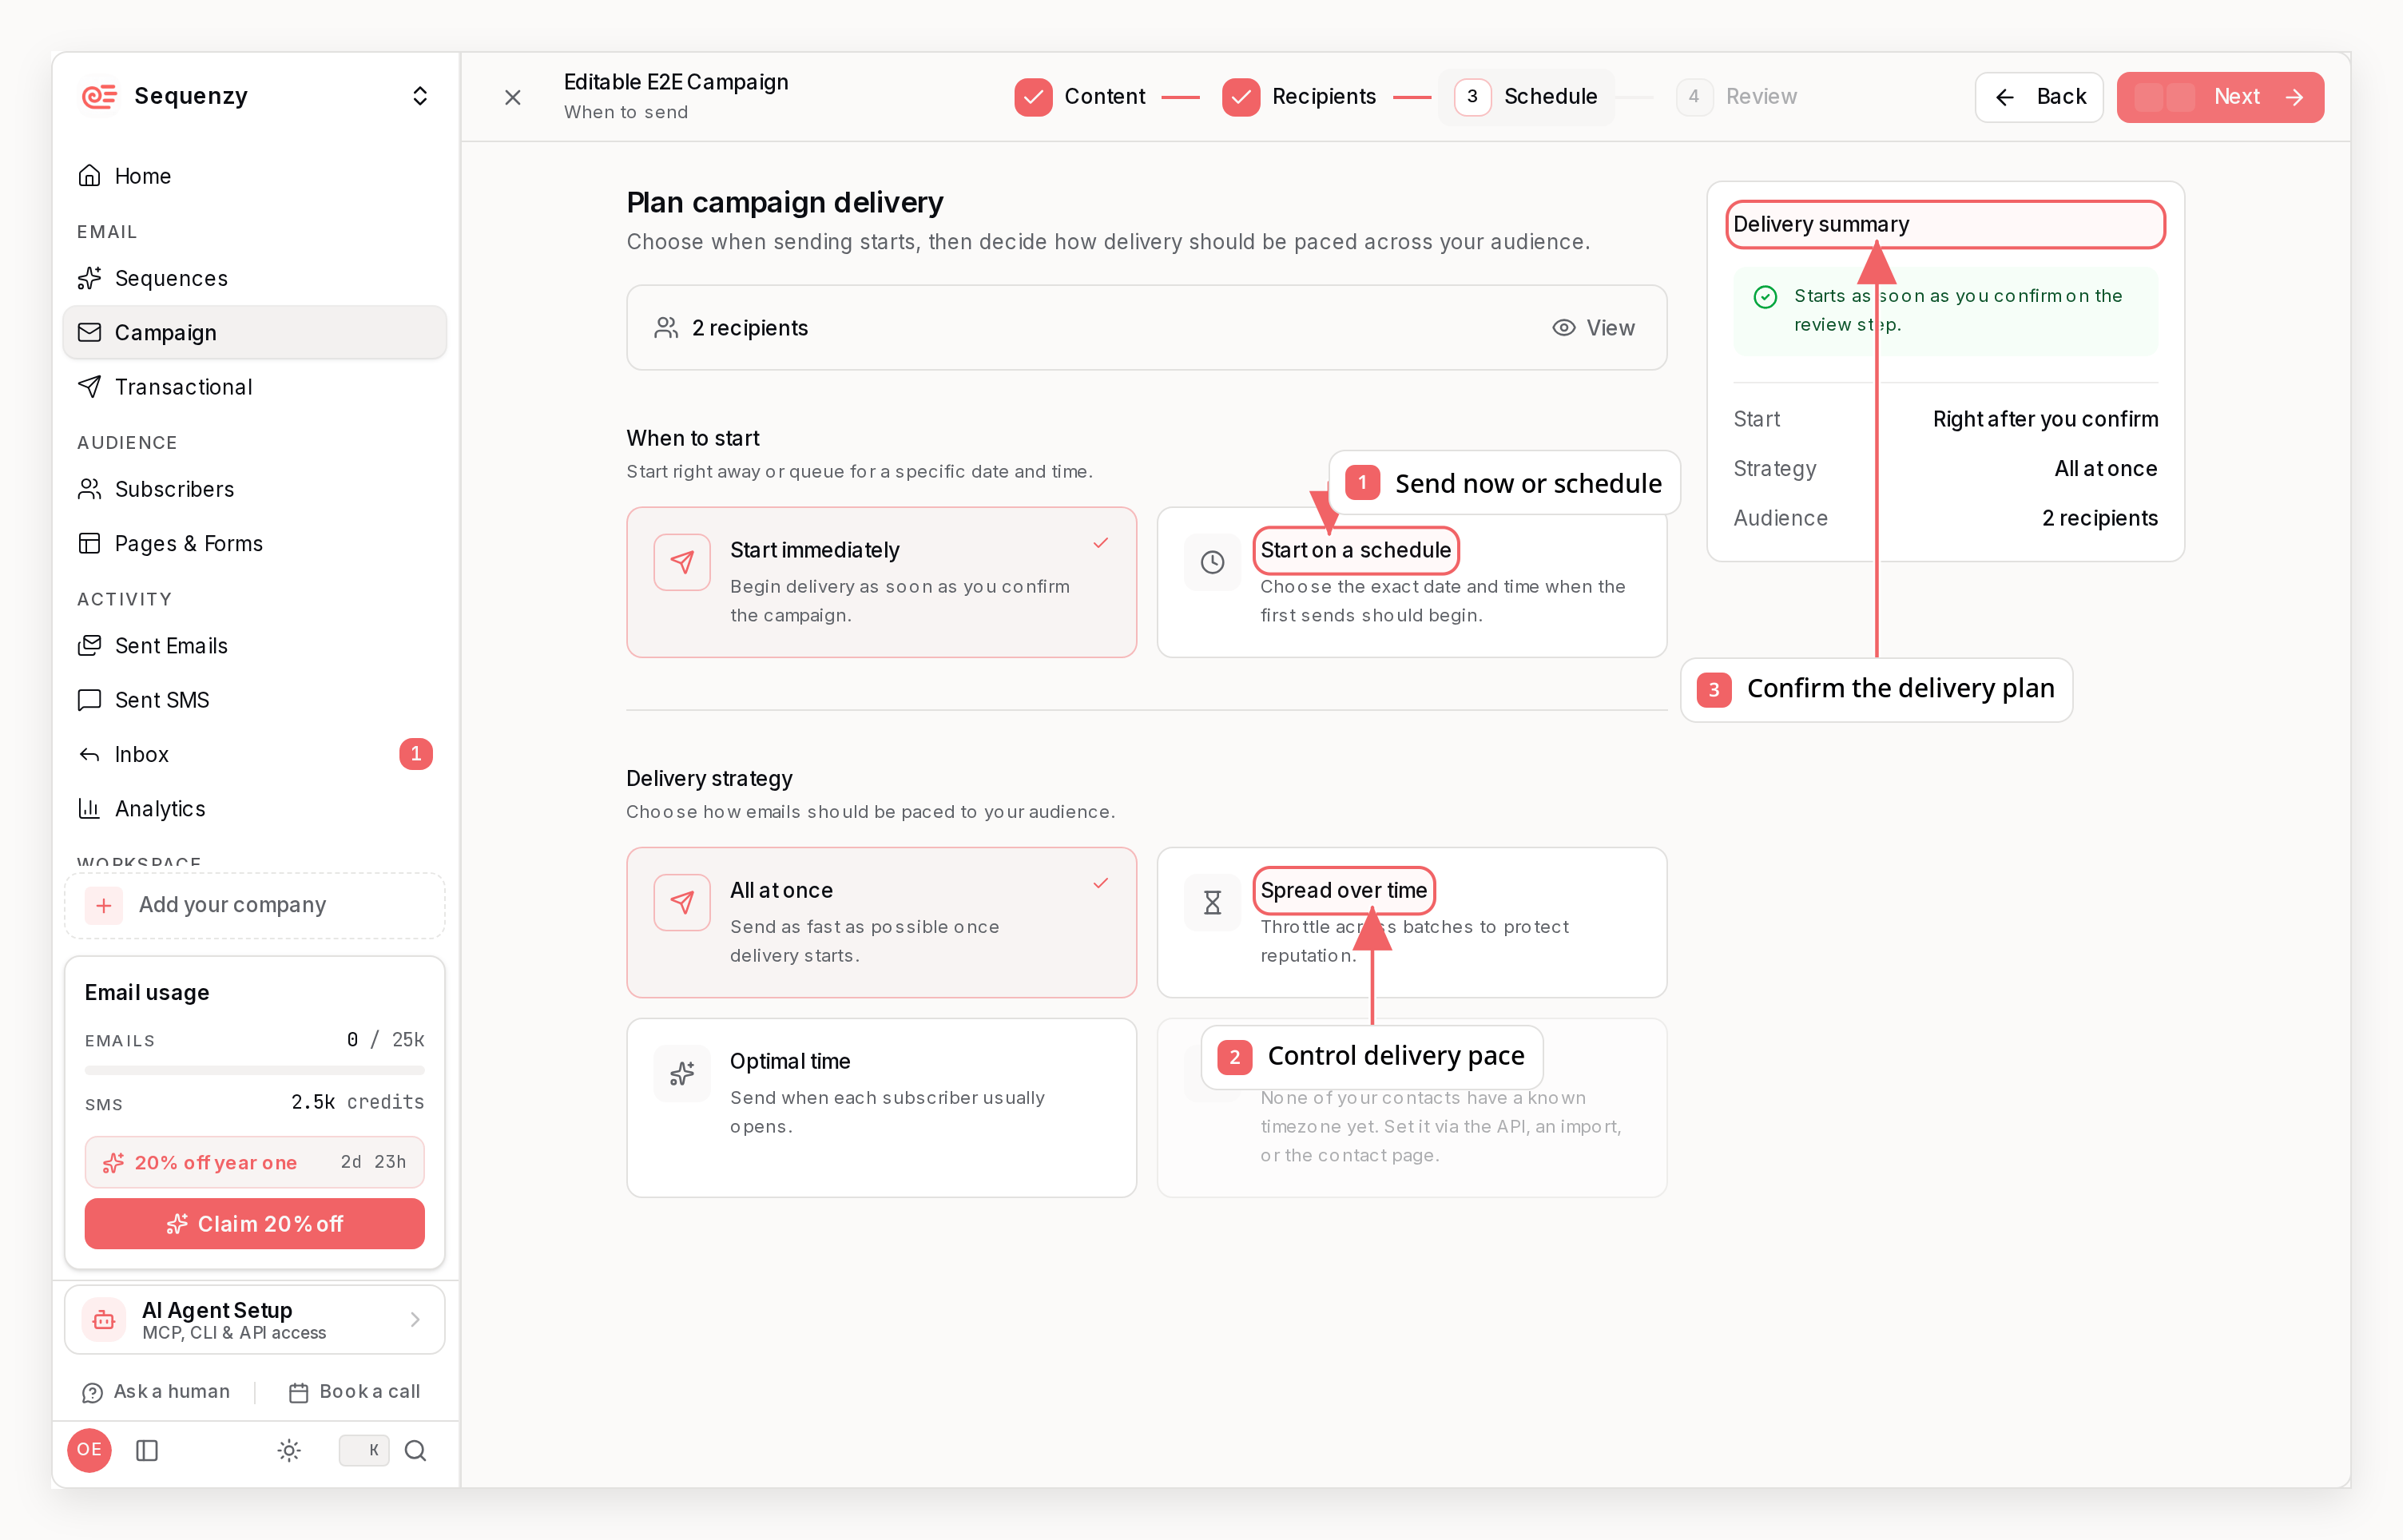
- Send Now: Queue immediately
- Schedule: Pick a specific date and time
- Spread Over Time: Distribute sends linearly over 1–72 hours
- Start time: Send now or schedule a future start
- Delivery strategy: All at once, Spread Over Time, or Send Time Optimization
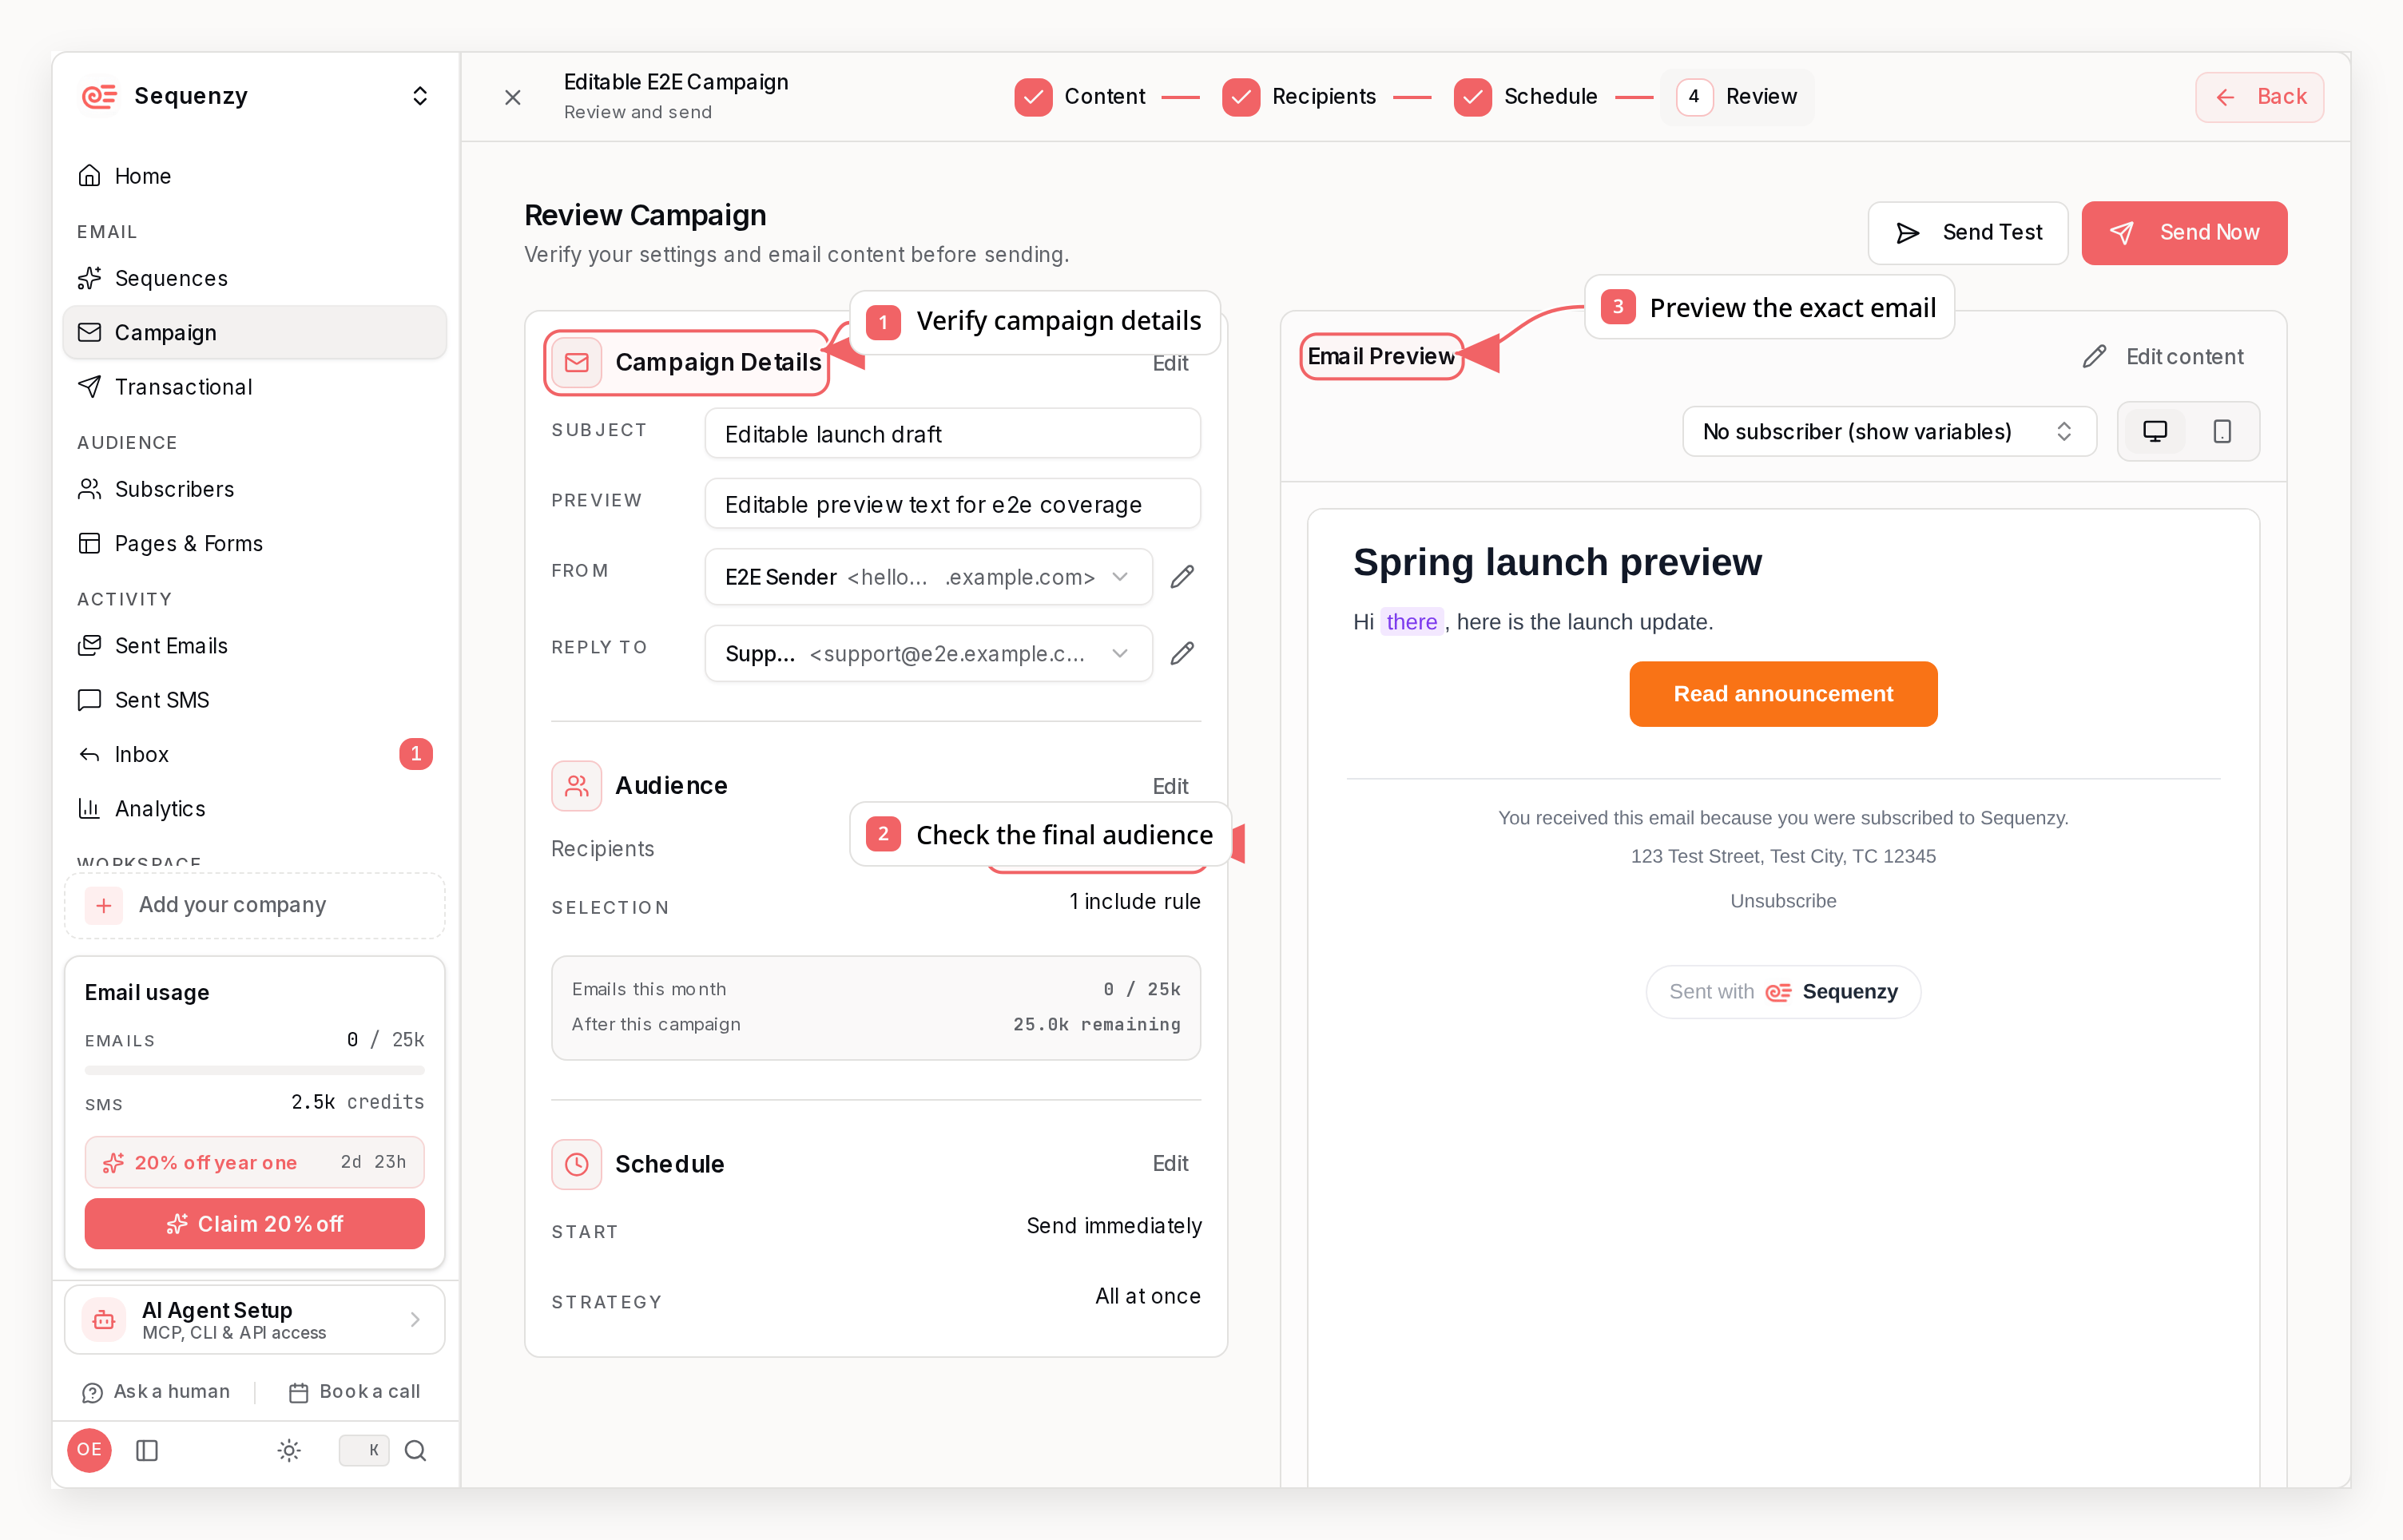
5. Review and Send
Recurring Campaigns
Scheduled campaigns can repeat automatically. When scheduling, set Repeat to “Every week” or “Every month” and the campaign becomes a recurring template:- At each run time, Sequenzy duplicates the template into a normal one-shot campaign and sends it
- The audience is re-evaluated at every run, so new subscribers who match the list or segment are included and removed ones are skipped
- Each run gets its own campaign (named after the template with the run date) with its own stats
- The email content is snapshotted per run - you can edit the template between runs, and the next run picks up your changes without altering past runs
- Cancel the recurring campaign to stop the series; runs already sent are unaffected
If the platform is briefly unavailable at a run time, the run starts as soon
as it recovers. Runs missed by more than the full interval are skipped, not
sent in a burst.
5. Spread Over Time (Optional)
Enable Spread Over Time to distribute your campaign sends gradually over a configurable window, protecting your sender reputation during warmup. How it works:- Choose when the campaign should start sending
- Select “Spread over time” as the delivery strategy
- Use the slider to choose a delivery window (1-72 hours)
- The first batch sends at the chosen start time
- Remaining batches are spaced evenly across the window
- Warming up a new sending domain
- Sending your first large campaign (1,000+ recipients)
- You’ve sent fewer than 10,000 emails total (Sequenzy will recommend this automatically)
Spread Over Time and Send Time Optimization are mutually exclusive. You can
only enable one per campaign.
Pauses and Sending Locks
A manual campaign pause stores the pause on that campaign. You can resume it from the campaign page, and Sequenzy uses the saved spread setting unless you choose a new one on resume. Company sending pauses and real account bans are different. They act as parent sending locks and do not rewrite every campaign row. Running or due scheduled campaigns show Sending paused while the lock is active. When the lock is removed, campaigns that are still sending or already due continue through the normal resume worker; future scheduled campaigns wait for their scheduled start. If you do not want a campaign to continue after company sending is restored, pause that campaign manually. The manual pause remains until you resume it.6. Send Time Optimization (Optional)
Enable Send Time Optimization to deliver emails at each subscriber’s optimal time based on their engagement patterns. How it works:- Toggle “Send Time Optimization” on the schedule step
- Sequenzy analyzes each subscriber’s historical open times (last 90 days)
- Emails are delivered within a 12-hour window at each subscriber’s optimal hour
- Subscribers without enough data receive emails at the scheduled time
- Subscribers need at least 5 email opens in the last 90 days
- The UI shows how many subscribers have computed optimal times
7. Recipient’s Local Time (Optional)
Deliver a scheduled campaign at the same wall-clock time in every recipient’s own timezone - “send when it’s 8pm for the customer”. How it works:- Store a timezone on your contacts (see Subscribers) - via the API
timezonefield, a CSV import, the MCP tools, or the contact page - On the schedule step, pick a date and time and choose “Recipient’s local time” as the delivery strategy
- Each contact receives the campaign when their local clock reaches the scheduled time. Timezones ahead of yours are delivered earlier - processing starts when the scheduled time first occurs on Earth (UTC+14)
- Contacts without a stored timezone receive the campaign at the scheduled time in your timezone, and timezones whose local time already passed when processing starts receive it immediately
- The option is available once at least one recipient has a known timezone; the schedule step shows how many contacts will get local-time delivery
- Not combinable with repeats, Spread Over Time, or Send Time Optimization
- Also available from the API (
sendInRecipientTimezone+scheduledTimezone), the CLI (campaigns schedule --in-recipient-timezone --scheduled-timezone), and the MCPschedule_campaigntool
Filtering Options
Status Filters
Tag Filters
Example: Target customers, exclude churned:
Email Filters
is and is_not match the full address and ignore case, so they are the right
choice for explicit allowlists (QA contacts) and exclusions. Use contains when
you want a domain or substring.
Example: Target company emails:
Date Filters
You can use rolling values like
7 days ago, natural language like last week, or fixed dates like 2026-03-01 and Mar 1 2026.
Rolling values update automatically as time passes. Fixed dates stay fixed.
Examples:
Name Filters
Filter Combinations
Filters are combined with AND logic:Public Share Links
Every email campaign can be shared through a public “view in browser” link - useful for showing a campaign to stakeholders, clients, or anyone outside your audience. Unlike the{{viewInBrowserUrl}} merge tag, which serves one
recipient’s personalized copy, the share link renders an anonymized version:
a sample contact instead of subscriber data, an inert unsubscribe link, and no
open or click tracking.
Click Share in the campaign editor to open the hosted page in a new tab - the
link is minted automatically the first time, and drafts can be shared too, so
you can circulate a campaign for review before it is scheduled or sent. Links
can also be created via the API,
with sequenzy campaigns share, or through the share_campaign MCP tool. The
link is a high-entropy URL that only exists once it is created, and it is
revocable via the API, sequenzy campaigns unshare, or unshare_campaign -
after revoking, the old URL returns 404 immediately and sharing again produces
a different URL.
Transactional emails, sequence emails, and standalone templates can be shared
the same way through their underlying email: use the Share button in the
email editor, the templates API,
sequenzy templates share, or the share_template MCP tool. Campaign links
stay campaign-level so a shared A/B campaign always shows the winning
variant.
Sending Process
When a campaign is sent:Personalization
Available Variables
Use these in your email content:
The
subscriber. prefix also accepts the contact’s core fields -
{{subscriber.firstName}}, {{subscriber.lastName}}, {{subscriber.email}},
and {{subscriber.name}} - so either form works for those. A custom attribute
of the same name still wins. The prefix is scoped to the contact, so it does not
reach company or URL variables: use {{COMPANY_NAME}}, not
{{subscriber.companyName}}.
Example
|there syntax provides a fallback if the name is missing, and
{{ FIRST_NAME | default: "there" }} does the same thing.
Raw HTML Attribute Values
Merge tag values are always HTML-escaped, so an attribute holding markup like<p>...</p> renders as visible code. When a custom attribute stores trusted,
prebuilt HTML - for example a unique per-recipient body your system generated -
add the html. prefix to render it as markup:
{{subscriber.subject}} in the subject line pairs with it for per-recipient
subjects.
Keep these rules in mind:
- Only render HTML you generate or trust. Never route end-user input through a
raw HTML tag; a regular
{{subscriber.attribute}}stays escaped. - Injected HTML is sanitized: scripts, inline event handlers, and dangerous URLs are stripped.
- The prefix only applies in HTML text position. Inside attributes such as
hreforsrc, the value is validated and escaped like an ordinary tag. - Store final HTML. Merge tags still present in the injected HTML are substituted before sending, so resolve your own placeholder syntax first.
{{html.prerenderedHtml}}.
Tracking
Open Tracking
When enabled, Sequenzy tracks email opens via a tracking pixel.Click Tracking
When enabled, links are wrapped to track clicks:You can enable/disable tracking per company in Settings → Tracking.
Analytics
When a Campaign Was Sent
Reopening a finished campaign shows the date and time it went out next to the Sent badge. A campaign without recorded pacing readsSent <date>; a paced
one reads Finished <date>, because for native sends that timestamp is when the
last recipient was handed off rather than when sending began. Hover or focus the info button
beside it for the recorded send strategy - no pacing recorded, spread evenly
over a set number of hours, or at each recipient’s optimal open time - plus the
scheduled time when one was set. Imported campaigns may not include pacing
metadata from their source provider. The scheduled time is not presented as the
actual start, because safety review or queue delays can postpone delivery.
You do not have to open a campaign to check. Each row in the campaign list shows
a relative age, and hovering its Sent badge gives the same record - the exact
date, plus the recorded pacing when there is any.
The same record is available outside the dashboard. sentAt, spreadOverHours,
sendTimeOptimization, and sendTimeWindowHours all come back from
List Campaigns,
Get Campaign, the sequenzy campaigns list and
sequenzy campaigns get commands, and the list_campaigns / get_campaign MCP
tools. Change draft pacing with Update Campaign
or apply it when scheduling. STO is
campaign-only; sequences use a sending window instead.
After sending, view campaign performance:
Revenue Attribution
If you have goals configured, sent campaigns show revenue attribution metrics:
Attribution uses a 24-hour window from email interaction to conversion. Works automatically with Stripe, Polar, Paddle, and Dodo integrations.
Tracking Over Time
View how engagement changes:Resending to Non-Openers
After a campaign finishes sending, you can resend it to everyone in the same audience who didn’t open it. This is a simple way to recover opens - a second touch, often with a fresh subject line, reaches the people who missed the first send. On a sent campaign, use the Send to non-openers button. Before creating anything, it shows an estimate of how many subscribers haven’t opened the campaign yet, so you know the size of the resend up front. Confirming creates a new draft named<campaign> (Non-openers) that:
- Reuses the original campaign’s audience (all subscribers, lists, a saved segment, or a filtered audience), and
- Adds a “didn’t open this campaign” rule so only people who haven’t opened it yet are targeted.
excludedCampaignOpenerIds, recreate it from the original campaign and review the new draft before scheduling.
Resending to non-openers becomes available 6 hours after a campaign finishes
sending. This gives opens time to register, so the estimate and the resend
audience are accurate. It is not offered for imported
campaigns, which have no opens in Sequenzy to resend
against.
- API:
POST /api/v1/campaigns/{campaignId}/resend-to-non-openers(see the API reference) - CLI:
sequenzy campaigns resend-to-non-openers <id> - MCP: the
resend_campaign_to_non_openerstool
Imported Campaigns
When you move to Sequenzy, you can bring your old campaigns with you as historical records by creating them withstatus: "sent" and the original
sentAt (see Create Campaign). Sequenzy
records campaigns created this way as imported history and labels them
Imported in the campaign list and on the campaign page.
Only the email content and the send date come across. Sequenzy never delivered
these campaigns, so it has no recipients, delivery records, opens, clicks or
bounces for them - the campaign page says so in place of the usual analytics
rather than showing zeros. Resending to non-openers is unavailable for the same
reason.
Everything else works normally: you can view and share the email, duplicate it
into a new draft, rename it, and label it alongside the campaigns you send from
Sequenzy.
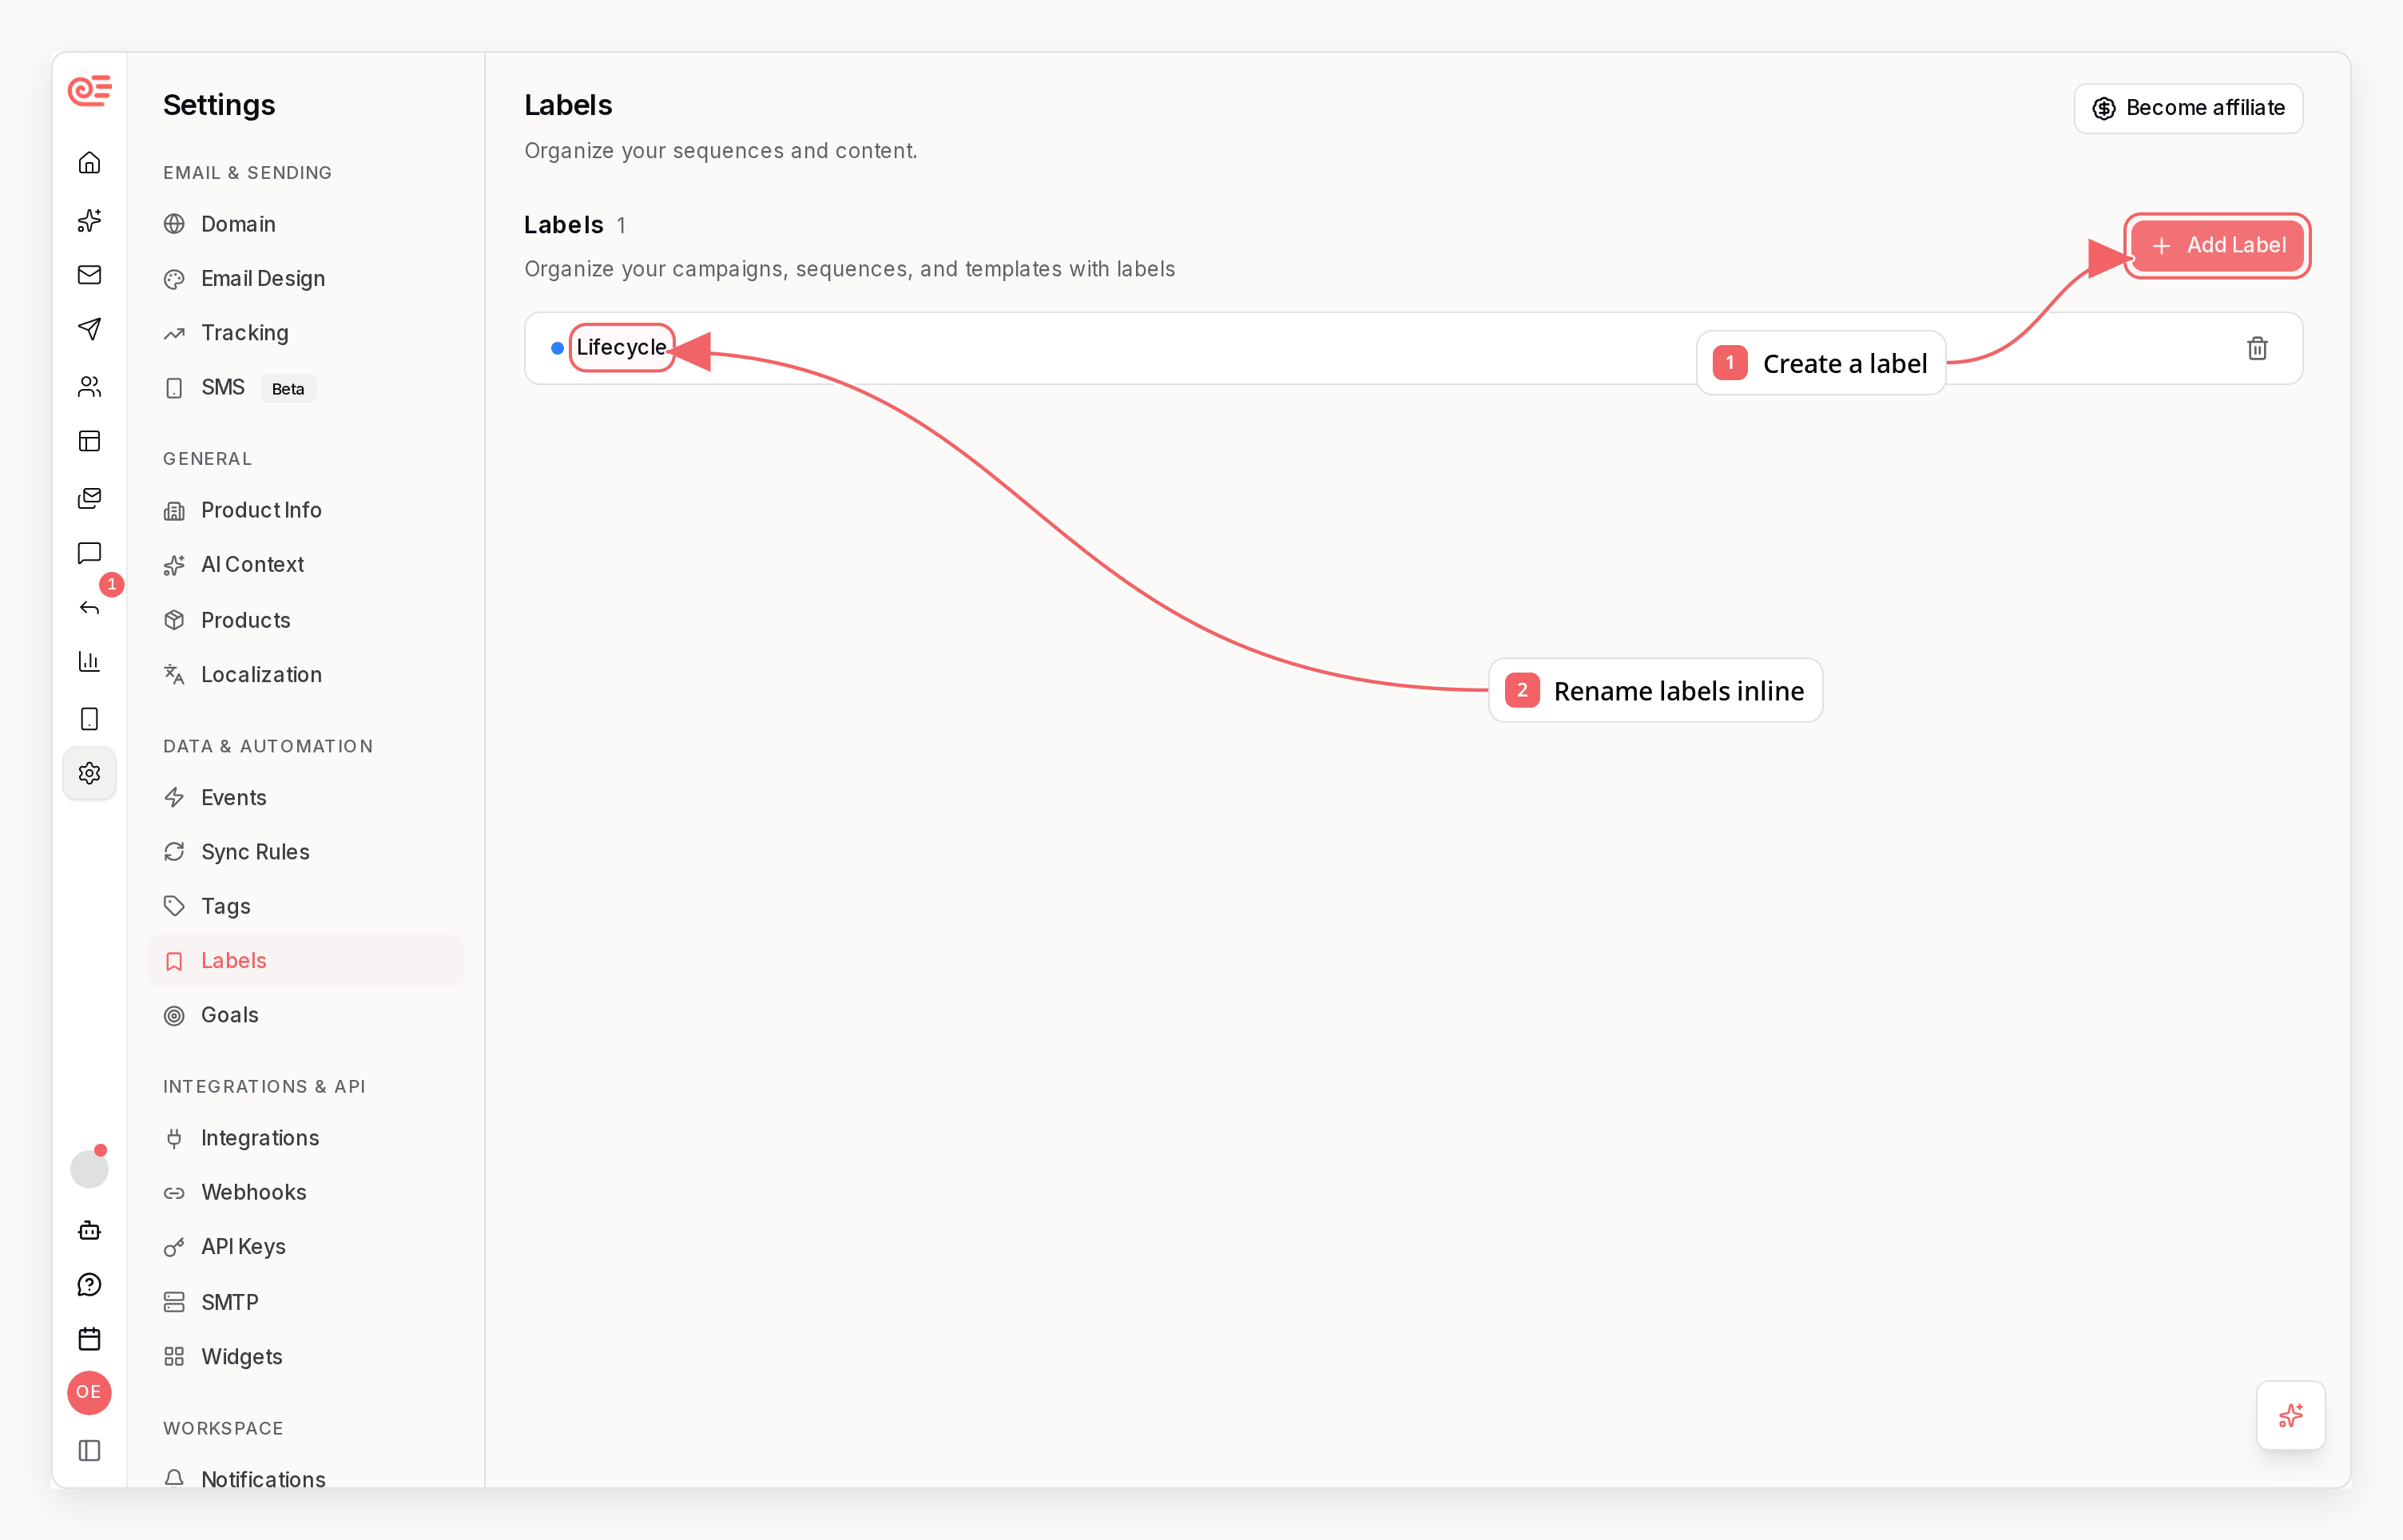
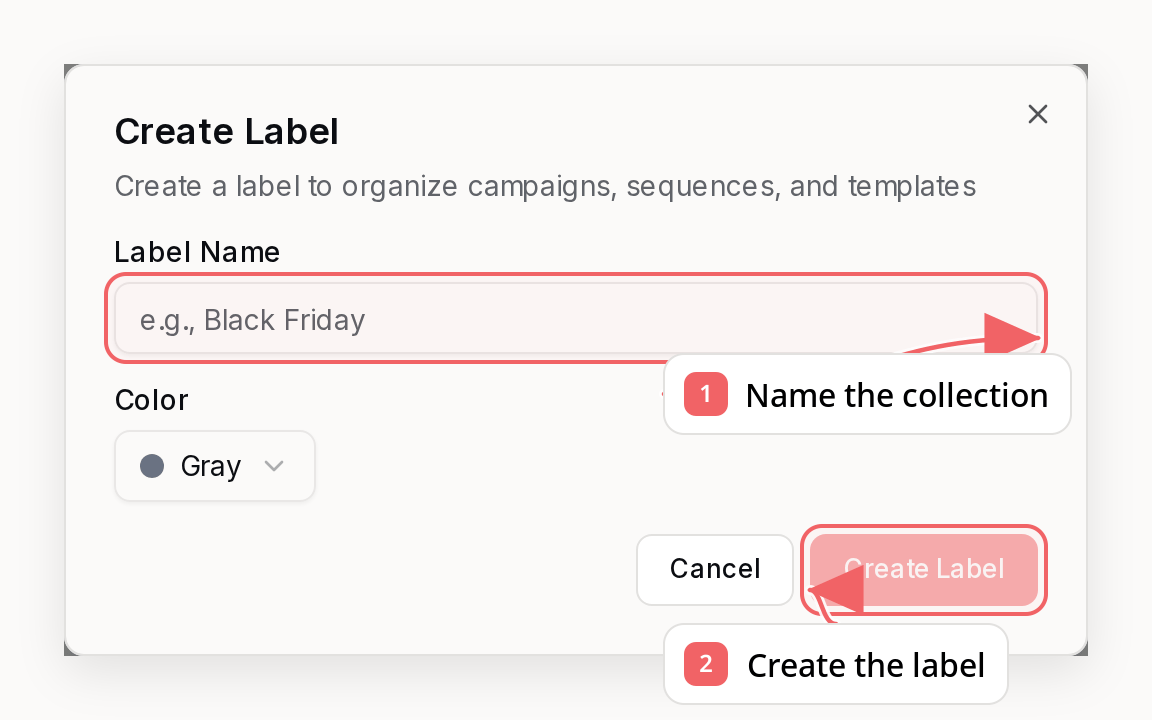
Organizing Campaigns and Sequences
Create a Label
Campaign Types
Newsletter
Regular updates to your entire list:Product Announcement
New feature or product launch:Promotional
Sales, discounts, special offers:Re-engagement
Bring back inactive subscribers:Segmented Updates
Different content for different segments:Best Practices
1. Test Before Sending
- Send a test email to yourself
- Check personalization renders correctly
- Verify links work
2. Segment Thoughtfully
Don’t send everything to everyone:3. Time Your Sends
- B2B: Tuesday-Thursday, 10am-2pm
- B2C: Evenings and weekends
- Consider time zones: Schedule for recipient’s local time
4. Monitor Deliverability
Watch your metrics:5. Respect Unsubscribes
- Process unsubscribes immediately
- Don’t re-add unsubscribed contacts
- Provide easy unsubscribe links
Campaigns vs Transactional
Related
Sequences
Automated multi-step workflows
Subscribers
Managing your contact list
Tags
Segmenting for targeting
Transactional
Per-user triggered emails