> ## Documentation Index
> Fetch the complete documentation index at: https://docs.sequenzy.com/llms.txt
> Use this file to discover all available pages before exploring further.
# Product Screenshot Workflow
> Capture, annotate, and embed useful product screenshots in Sequenzy docs and emails
# Product Screenshot Workflow
Product screenshots should answer one question at a glance: **where do I click
and what should I check?** This is the repeatable flow for turning a documented
dashboard journey into a screenshot with a visible focus ring, drop shadow, and
directional arrows.
## What deserves a screenshot?
After reviewing the docs, these are the highest-value screenshot candidates:
| Documentation flow | Capture the state that proves | Why it helps |
| ------------------------------------ | ------------------------------------------------------------------- | ------------------------------------------------------------ |
| [Quick Start](/quickstart) | Workspace Settings → API Keys with the create action visible | Removes the most common first-run guesswork |
| [Sequences](/concepts/sequences) | A sequence builder with the trigger, email, and delay steps visible | Makes the visual model concrete before someone builds a flow |
| [Email Editor](/guides/email-editor) | Components, preview, and AI review in the current editor | Makes the three editing surfaces understandable at a glance |
| [MCP](/concepts/mcp) | The AI Agent Setup dialog and client-specific instructions | Helps users find setup without exposing credentials |
| Settings guides | The exact settings section and its primary action | Connects a concept to the control that implements it |
| Integration guides | Sequenzy's dialog and the provider's real setup screen | Shows both sides of the connection without inventing UI |
Capture the smallest state that completes the step. A single focused view is
more useful than a full-page dump with unreadable controls.
## Capture → annotate → embed
### 1. Define the flow
Add a flow under `scripts/doc-screenshot-flows/`. Dashboard flows are split
between `core.ts` and `core-details.ts`, settings flows between `settings.ts`
and `settings-details.ts`, and provider dialogs live in `integrations.ts`. Give
it:
* the documentation path it supports;
* a stable route and a selector that means “the page is ready”;
* the frame to crop (`main` or a dialog-sized container); and
* selectors for the controls that deserve numbered labels.
Use accessible roles or stable text where possible. The screenshot should be
anchored to the product’s behavior, not a generated class name.
The generator covers dashboard concepts, content builders, settings, and
provider-specific integration dialogs. Run one ID, a comma-separated review
set, or the complete set:
```bash theme={null}
bun run docs:screenshots -- --flow api-key
bun run docs:screenshots -- --flow campaigns,sequence-builder,email-editor
bun run docs:screenshots -- --flow all
```
Every flow opens the current Sequenzy app and captures the seeded state shown by
the product itself.
### 2. Capture a safe, deterministic state
Use a disposable workspace with seeded data. The capture script supports either
a Playwright storage state or a short-lived browser login:
```bash theme={null}
# Start the local services, then add deterministic docs-only content
bun run dev:local
bun run docs:screenshots:seed
# Recommended for repeatable captures
DOC_SCREENSHOT_STORAGE_STATE=packages/front/tests/e2e/.auth/user.json \
DOC_SCREENSHOT_COMPANY_ID=e2e_company_acme \
bun run docs:screenshots -- \
--base-url http://localhost:3000 \
--flow sequence-builder
```
For a one-off local capture, use credentials through environment variables. Do
not put them in the flow file, a shell script, a screenshot, or a committed
`.auth` file:
```bash theme={null}
DOC_SCREENSHOT_EMAIL="you@example.com" \
DOC_SCREENSHOT_PASSWORD="use-a-short-lived-password" \
DOC_SCREENSHOT_COMPANY_ID="company_id" \
bun run docs:screenshots -- --flow api-key
```
The script never writes credentials. It writes the generated PNG under
`packages/docs/images/` and keeps the unannotated browser capture under the
gitignored `.context/docs-screenshots/raw/` directory for visual review.
Sensitive fields can declare `maskSelectors`; the generator covers them before
the annotation renderer sees the image.
### 3. Add visual guidance
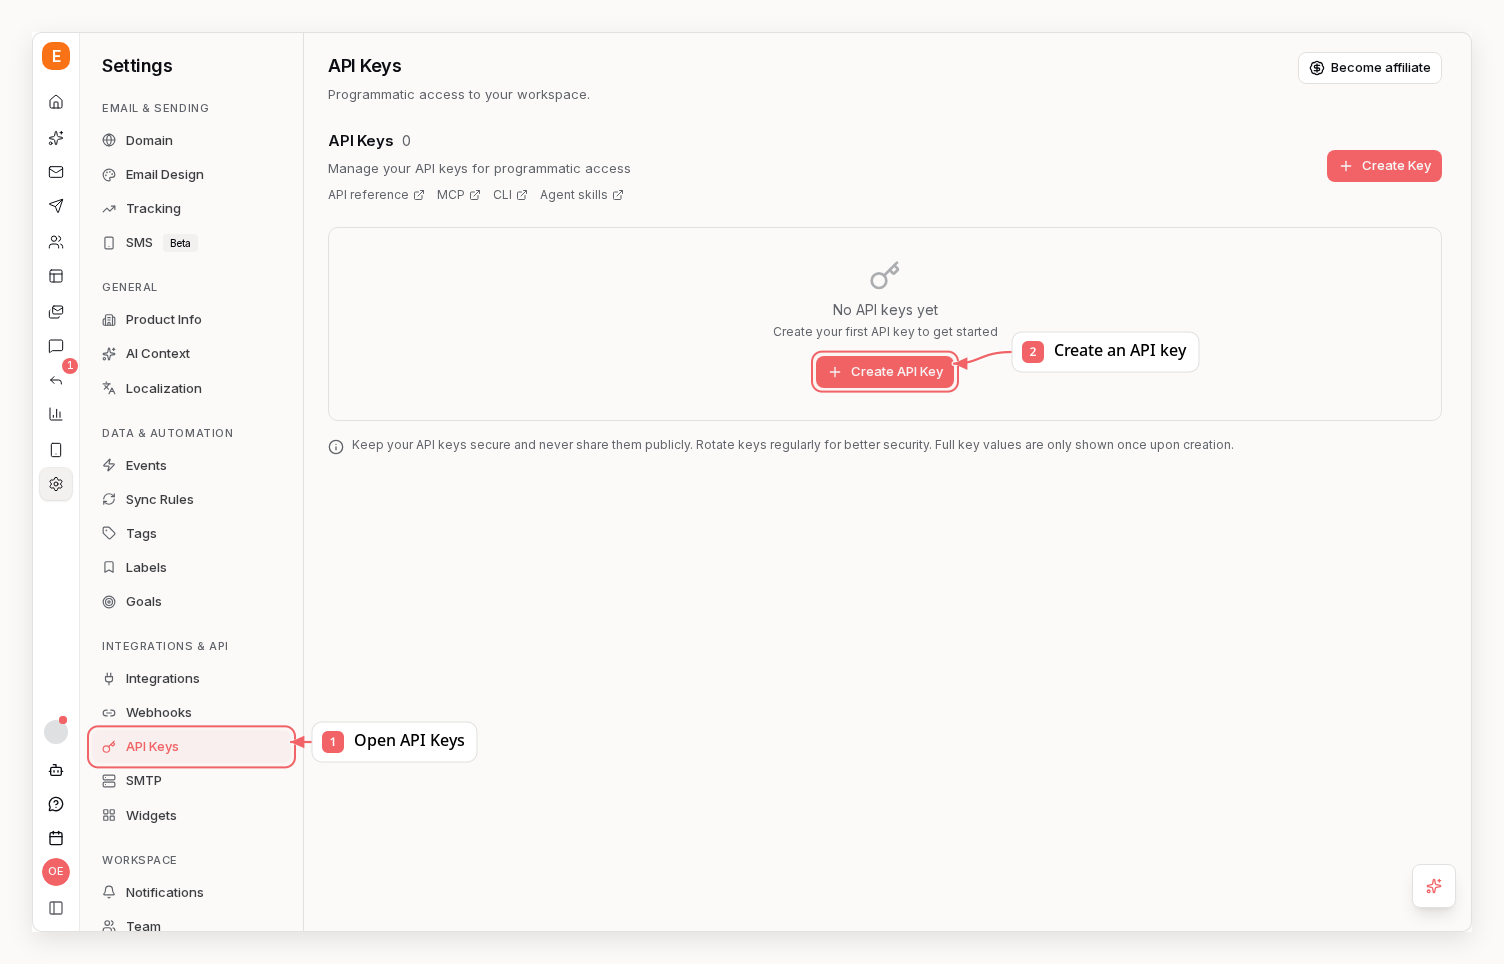
Every annotation has four parts:
1. a tight focus rectangle around the exact control;
2. a short, verb-first label such as “Open API Keys” or “Add an email”;
3. a restrained curved arrow that ends on the control; and
4. a warm matte and restrained frame shadow so the screenshot reads as a
deliberate card.
Keep labels outside dense controls and keep arrows inside the image bounds.
One screenshot should usually have two or three callouts. If it needs more,
split the flow into another frame instead of turning the image into a diagram.
Labels are sized for the final docs width, and arrows should end at a control's
edge instead of covering its text. For unusually wide rows and cards, arrows
land at the target's visual center so the callout cannot look like it refers to
an unrelated control at one end.
The annotation renderer uses the same visual language as the product: warm
white surfaces, `#f16366` coral, thin borders, compact type, and small radii.
Only the screenshot frame gets a shadow; labels stay flat and quiet.
Inter is bundled with the generator, and each label is measured before
rendering so longer instructions cannot overflow their callout.
### 4. Embed the generated asset
Use the generated path in the relevant MDX page with Mintlify’s `Frame`:
```mdx theme={null}
 ```
The `alt` text should describe the screen and the user-visible guidance. It
should still make sense if the image does not load.
The docs-wide mapping is maintained by the idempotent embed command. It reuses
one product state wherever the same flow is explained, adds more focused states
under the section that explains them, and leaves API endpoint reference pages
screenshot-free:
```bash theme={null}
bun run docs:screenshots:embed
```
### 5. Review before publishing
Run the docs checks and inspect the output at the size a reader will see it:
```bash theme={null}
bun test packages/docs/internal-links.test.ts
bun run format:check
```
Check that the arrows still land on the right control, secrets and personal
data are masked, the screenshot is readable on a narrow viewport, and the
surrounding prose tells the reader what to do next.
## Embedding the same screenshot in an email
If the screenshot belongs inside a campaign, sequence email, template, or
transactional email, upload the generated PNG to the workspace media library
with the `upload_image_asset` MCP tool. Insert the returned `imageBlock` into
the target email’s `blocks` array:
```json theme={null}
{
"filePath": "packages/docs/images/flows/api-key.png",
"altText": "Sequenzy API Keys settings with the navigation and create action called out",
"displayWidthPercent": 100,
"cropHeight": 420,
"objectFit": "contain",
"align": "center"
}
```
Upload is separate from editing: it does not change or send an email until the
returned `imageBlock` is explicitly added to that email. Use `contain` when the
arrows and labels must remain visible; use `cover` only for a deliberate hero
crop.
## Screenshot hygiene
* Never capture production customer data, API keys, webhook secrets, or real
subscriber addresses.
* Keep original third-party setup screenshots when a step happens in the
provider's dashboard. A Sequenzy connection dialog supplements that image; it
does not replace it.
* Prefer seeded names and values that explain the flow, such as “Lifecycle
Welcome” or `company_id`.
* Keep the source screenshot and its annotated output separate so the callouts
can be regenerated when the UI moves.
* Change the image when the documented interaction changes; do not leave a
screenshot that points at a control the user can no longer find.
```
The `alt` text should describe the screen and the user-visible guidance. It
should still make sense if the image does not load.
The docs-wide mapping is maintained by the idempotent embed command. It reuses
one product state wherever the same flow is explained, adds more focused states
under the section that explains them, and leaves API endpoint reference pages
screenshot-free:
```bash theme={null}
bun run docs:screenshots:embed
```
### 5. Review before publishing
Run the docs checks and inspect the output at the size a reader will see it:
```bash theme={null}
bun test packages/docs/internal-links.test.ts
bun run format:check
```
Check that the arrows still land on the right control, secrets and personal
data are masked, the screenshot is readable on a narrow viewport, and the
surrounding prose tells the reader what to do next.
## Embedding the same screenshot in an email
If the screenshot belongs inside a campaign, sequence email, template, or
transactional email, upload the generated PNG to the workspace media library
with the `upload_image_asset` MCP tool. Insert the returned `imageBlock` into
the target email’s `blocks` array:
```json theme={null}
{
"filePath": "packages/docs/images/flows/api-key.png",
"altText": "Sequenzy API Keys settings with the navigation and create action called out",
"displayWidthPercent": 100,
"cropHeight": 420,
"objectFit": "contain",
"align": "center"
}
```
Upload is separate from editing: it does not change or send an email until the
returned `imageBlock` is explicitly added to that email. Use `contain` when the
arrows and labels must remain visible; use `cover` only for a deliberate hero
crop.
## Screenshot hygiene
* Never capture production customer data, API keys, webhook secrets, or real
subscriber addresses.
* Keep original third-party setup screenshots when a step happens in the
provider's dashboard. A Sequenzy connection dialog supplements that image; it
does not replace it.
* Prefer seeded names and values that explain the flow, such as “Lifecycle
Welcome” or `company_id`.
* Keep the source screenshot and its annotated output separate so the callouts
can be regenerated when the UI moves.
* Change the image when the documented interaction changes; do not leave a
screenshot that points at a control the user can no longer find.